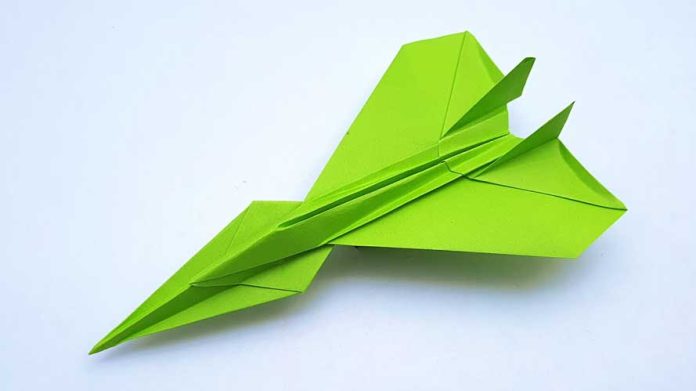
Are you fascinated by the art of paper folding and want to create something exciting and dynamic? Look no further! In this blog post, we’ll show you how to fold an origami jet fighter with easy-to-follow steps. This fun and creative project is perfect for both beginners and advanced origami enthusiasts. Grab your square sheet of paper, and let’s get started on making your very own origami jet fighter!
Materials You’ll Need:
- A square sheet of paper (6×6 inches or larger)
- A flat surface to work on
- Patience and a bit of creativity
Step 1: Start with a Square Paper
Begin with your square sheet of paper. If you’re using colored paper, make sure the color side is facing down. This will be the exterior of your jet fighter.
Step 2: Create the Diagonal Folds
Fold the paper diagonally in half to form a triangle. Crease well and unfold. Repeat this for the other diagonal, so you have two intersecting creases that form an “X” on your paper.
Step 3: Fold the Paper in Half
Fold the paper in half horizontally to form a rectangle. Crease well and unfold.
Step 4: Fold the Paper into a Kite Shape
Fold the top corners down to meet at the center crease, forming a kite shape. Make sure the edges align perfectly.
Step 5: Fold the Top Point Down
Take the top point of the kite and fold it down to meet the bottom point. Crease well.
Step 6: Fold the Wings
Flip the paper over. Fold the top layer’s right edge to align with the center crease. Repeat this step for the left edge to create symmetrical wings.
Step 7: Form the Body of the Jet
Turn the paper over again. Fold the top point down to the center, creating a sharp point at the nose of the jet. Then fold the nose up, aligning with the top edge of the wings. Crease well.
Step 8: Shape the Wings
Fold each wing outwards, making sure the edges are sharp and defined. Adjust the wings so they look even and symmetrical.
Step 9: Final Touches
Carefully shape the jet fighter by adjusting the wings and nose to ensure everything is aligned. Make sure all creases are sharp and the jet looks sleek.
Step 10: Test Your Origami Jet Fighter
Once you’ve completed all the folds, give your jet fighter a test flight! Hold it by the body and gently throw it forward to see it soar.
Additional Tips:
- Use a ruler or a bone folder to make sharp creases.
- Experiment with different paper sizes and colors for a unique look.
- Practice makes perfect, so don’t be discouraged if your first jet isn’t perfect. Keep trying!
Creating an origami jet fighter is a fun and rewarding experience that combines creativity with precision. By following this step-by-step guide on how to fold an origami jet fighter, you’ll have a fantastic paper airplane that’s ready to take to the skies. Happy folding!


