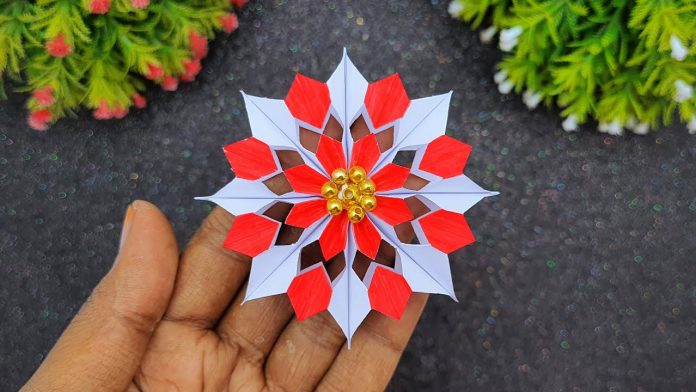
Get ready to add a touch of magic to your holiday decor with these Amazing 3D Christmas Snowflakes! These eye-catching snowflakes are not only beautiful but also easy to make, even for beginners. Follow this step-by-step guide to create stunning 3D snowflakes that will bring festive cheer to your home.
Materials You’ll Need:
- White or colored paper (preferably cardstock for sturdiness)
- Scissors
- Glue stick or double-sided tape
- Ruler
- Pencil
- String or ribbon (for hanging)
- Optional: glitter, sequins, or small beads for decoration
Step 1: Gather Your Materials
Start by gathering all the materials you’ll need. While white paper is traditional, you can use colored paper to match your holiday decor. Cardstock is recommended for a sturdier 3D effect, but regular paper will work if that’s what you have on hand.
Step 2: Cut the Paper into Squares
To create a 3D snowflake, you’ll need six equal-sized squares. The size of these squares will determine the size of your finished snowflake. A good starting size is 6×6 inches, but you can adjust based on your preference. Use a ruler to measure and cut the paper into squares.
Step 3: Fold the Paper
Take one square and fold it diagonally to form a triangle. Fold the triangle in half again to create a smaller triangle. Repeat this process with all six squares.
Step 4: Make the Cuts
Hold one folded triangle with the longest side facing you. Use your scissors to make three evenly spaced cuts from the folded edge toward the open edge, stopping about 1/4 inch from the open edge each time. These cuts will create the layers for your 3D snowflake.
Step 5: Unfold the Paper
Carefully unfold each triangle to reveal a square with a series of parallel cuts. Be gentle to avoid tearing the paper. Repeat this step for all six squares.
Step 6: Create the 3D Effect
To create the 3D effect, start with the innermost section of one square. Curl the two points of this section toward each other and secure them with glue or tape. Flip the square over and repeat the process with the next set of points, curling them in the opposite direction. Continue this alternating process until all sections are secured, forming a 3D spiral. Repeat for all six squares.
Step 7: Assemble the Snowflake
Once all six pieces are curled and secured, it’s time to assemble your snowflake. Start by joining three of the curled pieces together at the tips using glue or tape. Repeat with the other three pieces. Then, attach the two groups together at their tips to form the complete snowflake. Ensure all points are securely attached so that the snowflake holds its shape.
Step 8: Add Decorations (Optional)
For a touch of sparkle, you can decorate your snowflake with glitter, sequins, or small beads. Apply these decorations sparingly to avoid weighing down the paper. You can also paint the edges of the snowflake for a frosted effect.
Step 9: Attach a String for Hanging
Cut a piece of string or ribbon and attach it to one of the tips of your snowflake using glue or tape. Your 3D Christmas Snowflake is now ready to hang! Display it in a window, from the ceiling, or as a beautiful addition to your Christmas tree.
Step 10: Display Your Snowflakes
Find the perfect spot to display your Amazing 3D Christmas Snowflakes. These stunning decorations are sure to catch the eye and bring a festive feel to any room. You can create a winter wonderland by making multiple snowflakes in different sizes and colors.
Additional Tips:
- Experiment with different sizes of squares to create a variety of snowflake sizes.
- Layer multiple snowflakes together to create a fuller, more intricate design.
- Create a garland by stringing multiple 3D snowflakes together with thread or ribbon.
Making Amazing 3D Christmas Snowflakes is a delightful way to embrace the holiday spirit and add a personal touch to your seasonal decor. With just a few simple materials and a little creativity, you can craft stunning decorations that will make your home feel even more magical this Christmas. Happy crafting!


