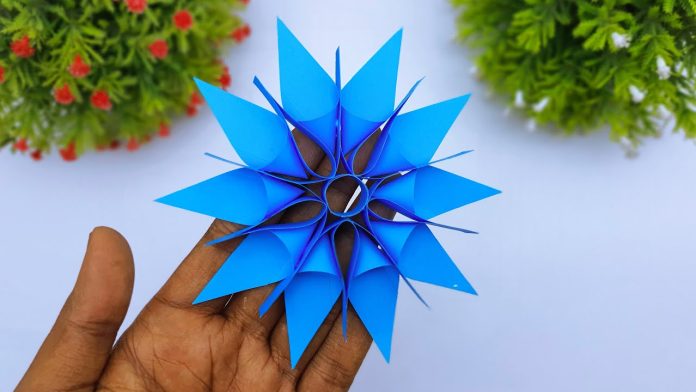
The holiday season is the perfect time to get creative with festive decorations. If you’re looking for a unique and eye-catching project, these DIY 3D Christmas snowflakes making ideas are just what you need. These snowflakes add a magical touch to any room, and they’re surprisingly easy to make. Follow this step-by-step guide to create your own beautiful 3D snowflakes.
Materials You’ll Need:
- White or colored paper (cardstock works best for sturdiness)
- Scissors
- Glue stick or double-sided tape
- Ruler
- Pencil
- String or ribbon (for hanging)
- Optional: glitter, sequins, or paint for decoration
Step 1: Gather Your Materials
Start by gathering all the materials you’ll need. White paper is traditional for snowflakes, but you can use colored or patterned paper for a fun twist. Ensure you have sharp scissors and a ruler for precise cutting.
Step 2: Cut the Paper into Squares
To create a 3D snowflake, you’ll need six equal-sized squares. The size of the squares will determine the size of your finished snowflake. A good starting size is 6×6 inches, but you can adjust according to your preference. Use a ruler and pencil to measure and cut the paper into squares.
Step 3: Fold the Paper
Take one square and fold it in half diagonally to form a triangle. Fold the triangle in half again to create a smaller triangle. Repeat this process with all six squares.
Step 4: Make the Cuts
Hold one folded triangle with the longest side (the base) facing you. Use your scissors to make three evenly spaced cuts from the folded edge towards the open edge, stopping about 1/4 inch from the open edge each time. These cuts will create the layers for your 3D snowflake.
Step 5: Unfold the Paper
Carefully unfold each triangle to reveal a square with a series of parallel cuts. Be gentle to avoid tearing the paper. Repeat this step for all six squares.
Step 6: Create the 3D Effect
Take one of the unfolded squares and begin forming the 3D effect by curling the innermost cut lines toward the center and gluing or taping the tips together. Flip the square over and repeat with the next set of cut lines, curling them in the opposite direction and securing them together. Continue this process, alternating directions, until all the layers are secured. Repeat for all six squares.
Step 7: Assemble the Snowflake
Once all six pieces are curled and secured, it’s time to assemble your snowflake. Start by joining three of the curled pieces together at the tips using glue or tape. Repeat with the other three pieces. Then, attach the two groups together at their tips to form the complete snowflake. Ensure all points are securely attached, and the snowflake holds its shape.
Step 8: Add Decorations (Optional)
For a little extra sparkle, you can decorate your snowflake with glitter, sequins, or a light dusting of paint. Apply these decorations sparingly to avoid weighing down the paper.
Step 9: Attach a String for Hanging
Cut a piece of string or ribbon and attach it to one of the tips of your snowflake, securing it with glue or tape. Your 3D snowflake is now ready to hang! Display it in a window, from the ceiling, or as part of your Christmas tree decorations.
Step 10: Display and Enjoy
Find the perfect spot to display your beautiful 3D Christmas snowflake. Whether you create a single snowflake or a whole flurry of them, these handmade decorations will add a festive and elegant touch to your holiday decor.
Additional Tips:
- Experiment with different sizes of squares to create a variety of snowflake sizes.
- Use double-sided patterned paper for an extra pop of color and design.
- Create a garland by stringing multiple 3D snowflakes together.
These DIY 3D Christmas snowflakes making ideas are a fantastic way to bring the winter wonderland indoors. With just a few simple materials and a bit of creativity, you can craft stunning decorations that will impress your family and friends. Happy crafting, and may your holidays be filled with joy and creativity!


