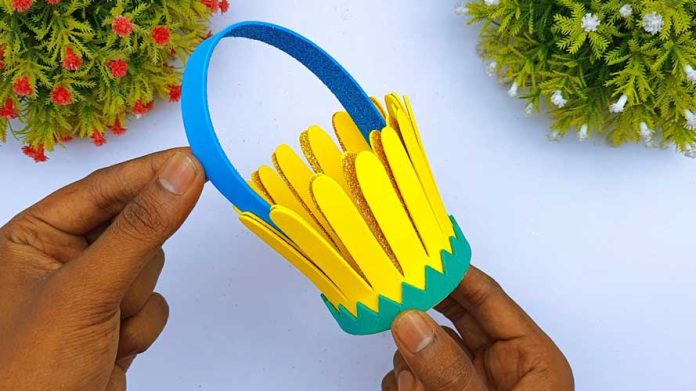
Are you ready to add a touch of sweetness and charm to your home decor? Look no further than DIY adorable Foamiran flower basket making! With just a few simple materials and a bit of creativity, you can craft beautiful floral arrangements that will brighten up any room. In this step-by-step guide, we’ll walk you through the process of creating your own Foamiran flower basket masterpiece.
Materials Needed:
Before we begin, let’s gather the materials you’ll need for this project:
- Foamiran sheets in various colors
- Scissors
- Floral wire
- Glue gun and glue sticks
- Basket or container
- Floral foam
- Ribbon or decorative accents (optional)
Step 1: Choose Your Foamiran Colors
The first step in creating your Foamiran flower basket is to choose the colors you want to use for your flowers. Foamiran comes in a variety of vibrant hues, so feel free to mix and match to create a bouquet that suits your style and decor.
Step 2: Cut Out Your Flower Shapes
Using your scissors, cut out flower shapes from the Foamiran sheets. You can create petals of various sizes and shapes to add depth and dimension to your flowers. Experiment with different shapes and sizes until you find a design you love.
Step 3: Shape Your Flowers
Once you’ve cut out your flower shapes, it’s time to give them some dimension. Gently heat each flower shape with a heat gun or blow dryer to soften the Foamiran. Then, using your fingers, carefully mold the petals to create a natural-looking flower shape. Allow the flowers to cool and set before moving on to the next step.
Step 4: Assemble Your Flowers
Now it’s time to assemble your flowers! Starting with the smallest petals, layer the Foamiran pieces on top of each other, securing them with a dab of hot glue between each layer. Continue adding petals until you’re happy with the fullness and shape of your flower. Repeat this process to create as many flowers as you’d like for your bouquet.
Step 5: Prepare Your Basket
Prepare your basket or container by placing floral foam inside to hold your flowers in place. You can also use a block of floral foam or even a small Styrofoam ball, depending on the size of your container.
Step 6: Arrange Your Flowers
Once your flowers are assembled and your basket is prepared, it’s time to arrange your bouquet. Insert the stems of your flowers into the floral foam, arranging them in a pleasing arrangement. Feel free to mix and match colors and sizes to create a bouquet that’s uniquely yours.
Step 7: Add Decorative Accents (Optional)
If you’d like to add some extra flair to your flower basket, consider adding decorative accents like ribbon, beads, or other embellishments. You can hot glue these accents onto the basket or tie them around the handle for a finishing touch.
Step 8: Display Your Masterpiece
Once you’re happy with your Foamiran flower basket, it’s time to put it on display! Place it on a table, shelf, or mantel where it can be admired by all who enter your home. You can also give it as a thoughtful handmade gift to brighten someone’s day.
Step 9: Enjoy Your Handiwork
Sit back, relax, and enjoy the beauty of your handmade Foamiran flower basket. Whether you’re displaying it in your own home or gifting it to a loved one, your creation is sure to bring joy and happiness wherever it goes.
Step 10: Experiment and Have Fun
Don’t be afraid to experiment with different flower shapes, colors, and arrangements to create a truly unique Foamiran flower basket. Let your creativity run wild and have fun with the process – after all, crafting is all about expressing yourself and bringing beauty into the world.
In conclusion, DIY adorable Foamiran flower basket making is a wonderful way to add a touch of whimsy and charm to your home decor. With just a few simple materials and a bit of creativity, you can create stunning floral arrangements that will brighten up any room. So gather your supplies, roll up your sleeves, and let your imagination take flight!


