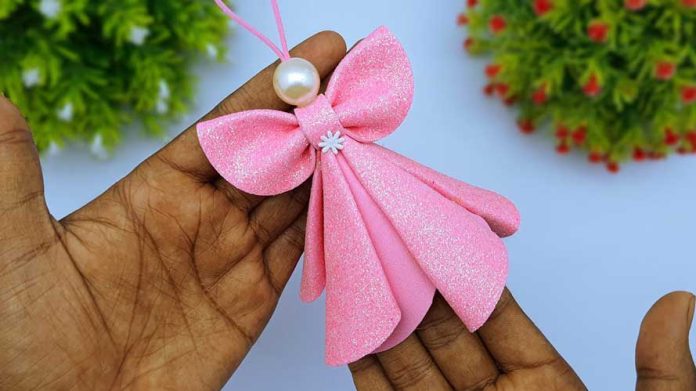
Angels are iconic symbols of Christmas, representing peace, hope, and the joy of the holiday season. Crafting your own Christmas angels can add a special touch to your decorations and create beautiful keepsakes or gifts. In this step-by-step guide, we’ll explore a variety of DIY Christmas angel-making ideas that will inspire your creativity and help you bring these celestial beings to life.
Materials You’ll Need:
Before diving into the crafting process, let’s gather the essential materials that can be used for various angel-making ideas:
- Crafting supplies: Such as scissors, hot glue gun, clear craft glue, and paintbrushes.
- Decorative materials: Including craft paint, markers, pencils, glitter, sequins, rhinestones, and any other embellishments.
- Ornament bases: Clear glass or plastic ornaments, wooden shapes, salt dough, or papier-mâché forms.
- Foamiran sheets: For creating angel wings, robes, or other elements.
- Wooden beads: For angel heads.
- Craft wire: To create halos, arms, or ornament hangers.
- Ribbon or twine: For creating loops for hanging.
- Faux flowers or decorative elements: Optional for embellishing angel robes or wings.
- Embossing tools (optional): To add texture and detail to wings or robes.
- Mod Podge or clear sealant (optional): To protect your finished angels.
Now, let’s explore some amazing Christmas angel-making ideas, complete with step-by-step instructions:
Idea 1: Foamiran Angel Ornaments
Step 1: Cut Out the Angel’s Body and Wings
- Use Foamiran sheets to cut out the angel’s body and wings. You can use templates or create your own designs.
Step 2: Craft the Angel’s Head and Halo
- Paint a wooden bead for the angel’s head with the desired skin tone.
- Once dry, use markers or pencils to add facial features.
- Create a halo using craft wire and attach it to the head.
Step 3: Assemble the Angel
- Attach the head to the angel’s body using clear craft glue.
- Secure the wings to the back of the body, ensuring they are symmetrical.
Step 4: Add Embellishments
- Decorate the angel’s robe with glitter, sequins, or rhinestones.
- Use faux flowers or other decorative elements to enhance the robe.
Step 5: Create a Hanging Loop
- Attach a ribbon or twine loop to the top of the angel’s head.
Idea 2: Salt Dough Angel Ornaments
Step 1: Create Salt Dough
- Mix salt dough using flour, salt, and water to form a workable dough.
- Roll out the dough and use cookie cutters or freehand shaping to create angel shapes.
Step 2: Bake and Paint
- Bake the salt dough ornaments according to your recipe.
- Once cooled, paint the ornaments with craft paint and allow them to dry.
Step 3: Decorate
- Add facial features, wings, and embellishments using markers, paint, or other decorative materials.
Step 4: Create a Hanging Loop
- Attach a ribbon or twine loop to the top of each ornament for hanging.
Idea 3: Paper Angel Ornaments
Step 1: Cut and Fold
- Cut out angel shapes from paper or cardstock.
- Fold the angels in half to create a 3D effect.
Step 2: Decorate
- Add facial features, robes, and wings using markers, paint, or other decorative materials.
Step 3: Create a Hanging Loop
- Attach a ribbon or twine loop to the top of each paper angel for hanging.
Conclusion:
Creating your own Christmas angels is a delightful way to add a personal and heartfelt touch to your holiday decor. These celestial beings, crafted with love and creativity, symbolize the essence of the season and the spirit of giving. So, gather your materials, choose your favorite angel-making idea, and embark on a crafting journey that will make your holiday celebrations even more special. Happy crafting!


