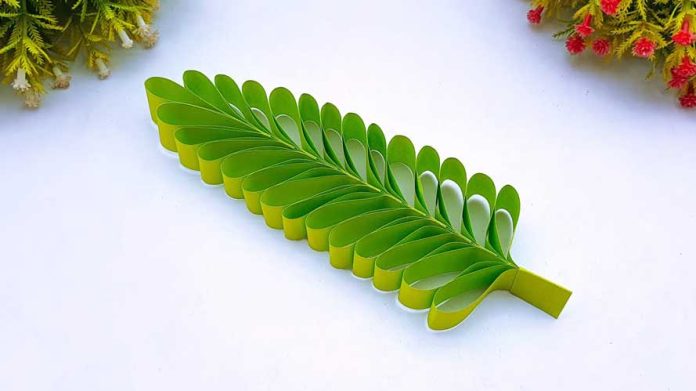
Decorative leaves can enhance your home decor, add a natural touch to your crafts, or serve as beautiful accents for special events. In this DIY Decorative Leaves Making Tutorial, we’ll walk you through the process of creating your own stunning leaves using a variety of materials. These leaves can be customized to suit any color scheme or style, making them perfect for any project.
Materials Needed:
- Green cardstock or construction paper
- Scissors
- Pencil
- Hot glue gun and glue sticks
- Floral wire
- Green floral tape
- Paint and paintbrushes (optional)
- Glitter (optional)
- Mod Podge or white glue (optional)
- Real leaves for reference (optional)
Step 1: Gather Your Materials
Ensure you have all the materials ready before starting your project. Choose your paper type and colors based on the look you want to achieve. For a more textured effect, consider using different materials like felt, fabric, or metallic paper.
Step 2: Draw Leaf Shapes
- Draw on Paper: Use a pencil to draw various leaf shapes on green cardstock or construction paper. Aim for different sizes and styles to add variety.
- Templates: If freehand drawing isn’t your strength, use templates from the internet or trace around real leaves for accuracy.
Step 3: Cut Out the Leaves
Carefully cut out the leaf shapes with scissors. Precision is key to ensure the edges are smooth and clean. If making multiple leaves, stack layers of paper and cut them simultaneously to save time.
Step 4: Add Details to the Leaves
- Draw Veins: Lightly draw veins on the leaves with a pencil to mimic real leaves. You can either keep it simple or create intricate patterns.
- Score Veins: For a more realistic look, lightly score along the veins with the edge of a pair of scissors or a craft knife.
Step 5: Shape the Leaves
- Curl and Fold: Gently curl the edges of the leaves by running a pencil or your fingers along the edges. You can also fold the leaves slightly along the veins to add depth and dimension.
- Create Texture: Slightly crease the leaves to make them look more natural and textured.
Step 6: Attach the Floral Wire
- Cut Floral Wire: Cut a piece of floral wire to the desired length of the leaf stem.
- Glue Wire: Use hot glue to attach the floral wire to the back of each leaf. Apply a thin line of glue along the center and press the wire into it. Allow the glue to dry completely.
Step 7: Wrap the Stems with Floral Tape
- Start at the Base: Beginning at the base of the leaf, wrap the floral tape around the floral wire.
- Wrap Down: Continue wrapping down to the end of the wire, stretching the tape slightly as you go to ensure it adheres well and creates a smooth stem.
Step 8: Add Finishing Touches (Optional)
- Painting: Add different shades of green or touches of metallic paint to the leaves for added depth and visual interest.
- Glitter: Apply a thin layer of Mod Podge or white glue to the leaves and sprinkle with glitter for a sparkling effect. Let it dry completely.
- Edging: Use a dry brush to lightly dust the edges of the leaves with gold or bronze paint for an elegant finish.
Step 9: Arrange and Display
- Enhance Arrangements: Use your decorative leaves to enhance floral arrangements, create beautiful centerpieces, or decorate wreaths and garlands.
- Standalone Decor: Place them in a vase or scatter them across a table for a natural and elegant look.
Conclusion:
Creating your own decorative leaves is a fun and versatile craft that can be used to enhance various projects. With this DIY Decorative Leaves Making Tutorial, you can make beautiful, realistic leaves that add a touch of nature to your home decor. Experiment with different materials and techniques to create unique pieces that reflect your personal style.
Gather your materials and start crafting these lovely decorative leaves today. Happy crafting!


