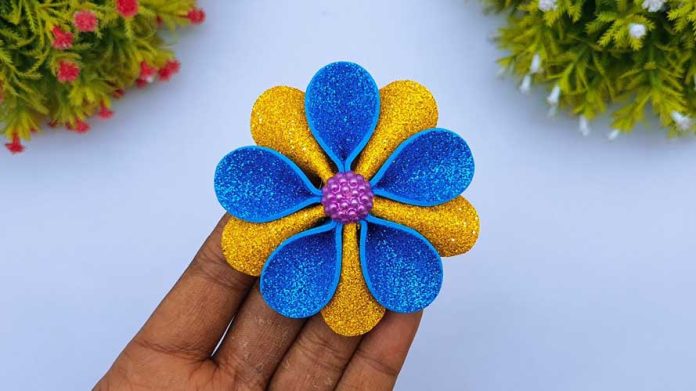
Elevate your crafting game with our DIY Glitter Foam Sheet Flowers tutorial. These charming blooms add a touch of sparkle and whimsy to any project, from greeting cards and scrapbook layouts to home decor and party decorations. With just a few simple materials and easy-to-follow steps, you can create stunning glitter foam sheet flowers that will dazzle and delight. Let’s dive into this sparkling tutorial and unleash your creativity with these beautiful blooms.
Materials Needed:
- Glitter foam sheets in various colors
- Scissors
- Floral wire or pipe cleaners
- Hot glue gun
- Floral tape
- Embellishments (such as beads, sequins, or rhinestones)
- Flower templates (optional)
- Pencil
Step 1: Choose Your Glitter Foam Sheets Start by selecting glitter foam sheets in the colors of your choice. Glitter foam sheets come in a variety of vibrant hues and are available at most craft stores. Choose colors that complement your project or theme, ensuring a cohesive and eye-catching result.
Step 2: Trace and Cut Flower Shapes Using flower templates or freehand drawing, trace flower shapes onto the glitter foam sheets using a pencil. You can create a variety of flower shapes and sizes to add visual interest to your project. Once traced, carefully cut out the flower shapes using scissors.
Step 3: Create Flower Centers To add dimension to your glitter foam sheet flowers, create flower centers using small circles or shapes cut from a contrasting color of glitter foam. You can also use beads, sequins, or rhinestones as centers for added sparkle. Attach the centers to the middle of each flower shape using hot glue.
Step 4: Shape Flower Petals Gently curl the petals of each flower shape to give them a lifelike appearance. You can do this by wrapping the edges of the petals around a pencil or your finger and gently pulling them outward. Experiment with different shaping techniques to achieve the desired look for your flowers.
Step 5: Attach Floral Wire Stems Cut floral wire or pipe cleaners to the desired length for the flower stems. Apply a dab of hot glue to one end of the wire and attach it to the back of the flower shape. Press down firmly to secure the wire in place. If using pipe cleaners, twist them around the base of the flower shape to create a secure hold.
Step 6: Wrap Stems with Floral Tape Once the hot glue has dried, wrap the floral wire stems with floral tape to cover and secure them. Start at the base of the flower and wrap the tape tightly around the wire, working your way down to the end of the stem. Continue wrapping until the entire stem is covered.
Step 7: Embellish with Additional Details To add extra flair to your glitter foam sheet flowers, embellish them with additional details such as beads, sequins, or rhinestones. Apply hot glue to the desired areas and attach the embellishments, pressing them gently into place. Get creative with your designs to customize the look of your flowers.
Step 8: Display and Enjoy Your DIY glitter foam sheet flowers are now ready to be displayed and enjoyed! Use them to embellish greeting cards, scrapbook layouts, home decor projects, or party decorations. Arrange them in a vase or bouquet for a sparkling floral display that adds a touch of glamour to any space.
Conclusion: With this DIY Glitter Foam Sheet Flowers tutorial, you can create stunning blooms that sparkle and shine. These versatile flowers are perfect for adding a touch of glamour to any crafting project, from cards and scrapbooks to home decor and party decorations. So gather your materials, follow the steps outlined in this tutorial, and let your creativity bloom with these dazzling glitter foam sheet flowers. Happy crafting!


