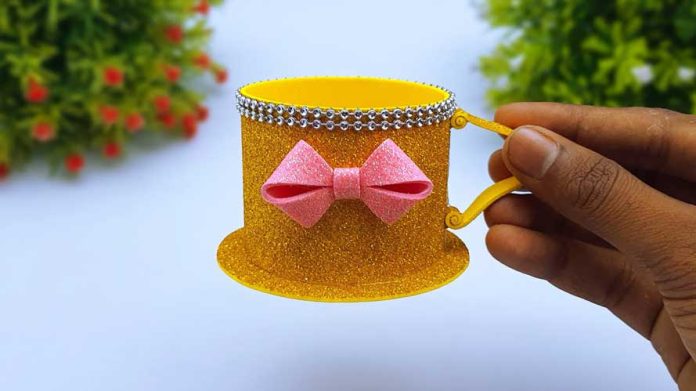
Are you looking for a fun and creative way to add a touch of whimsy to your home decor? Why not try making your own glitter foam sheet tea cup! In this step-by-step tutorial, we’ll guide you through the process of creating charming tea cups using glitter foam sheets and Foamiran. These delightful decorations are perfect for adding a pop of color and sparkle to any space, and they’re surprisingly easy to make. Let’s get started!
Materials Needed:
Before we begin, let’s gather the materials you’ll need for this project:
- Glitter foam sheets in various colors
- Foamiran sheets in complementary colors
- Scissors
- Craft glue or hot glue gun
- Pencil
- Ruler
- Embellishments such as sequins, beads, or ribbon (optional)
Step 1: Prepare Your Materials
Start by laying out your glitter foam sheets and Foamiran sheets on a clean, flat surface. Choose the colors you’d like to use for your tea cups and make sure you have enough material for each cup you plan to make. This is also a good time to gather any embellishments you’d like to use to decorate your tea cups.
Step 2: Cut Out the Tea Cup Shapes
Using your pencil and ruler, trace the outline of a tea cup onto the glitter foam sheet. You can find templates online or create your own design. Once you’ve traced the outline, carefully cut out the shape using scissors. Repeat this step for each tea cup you plan to make.
Step 3: Create the Tea Cup Handle
Next, use a different color of glitter foam sheet to trace and cut out a handle for each tea cup. The handle should be curved and slightly elongated to resemble a traditional tea cup handle. Once you’ve cut out the handles, set them aside for now.
Step 4: Cut Out Foamiran Inserts
Now it’s time to add a pop of color to your tea cups with Foamiran inserts. Use a contrasting color of Foamiran to trace and cut out inserts for the inside of each tea cup. These inserts will give your tea cups a finished look and add dimension to your decorations.
Step 5: Assemble the Tea Cups
Once you have all of your pieces cut out, it’s time to assemble the tea cups. Start by applying a thin layer of craft glue or using a hot glue gun to attach the Foamiran inserts to the inside of the glitter foam shapes. Then, glue the handles onto the sides of the tea cups, positioning them at a slight angle for a whimsical touch.
Step 6: Add Embellishments (Optional)
If you’d like to add some extra sparkle to your tea cups, now’s the time to do it! Use craft glue to attach sequins, beads, or ribbon to the outside of the tea cups for added decoration. Get creative and have fun experimenting with different embellishments to personalize your tea cups.
Step 7: Let the Glue Dry
Once you’ve finished decorating your tea cups, set them aside to dry completely. This will ensure that all of the pieces are securely attached before you display or use them.
Step 8: Display Your Tea Cups
Once the glue is dry, your glitter foam sheet tea cups are ready to be displayed! Arrange them on a shelf, mantel, or table to add a touch of whimsy to any room. You can also use them as table decorations for a tea party or other special event.
Step 9: Enjoy Your Handiwork
Sit back, relax, and admire your beautiful glitter foam sheet tea cups! Whether you’re displaying them in your own home or giving them as gifts, these charming decorations are sure to delight anyone who sees them.
Step 10: Experiment and Have Fun
Don’t be afraid to experiment with different colors, shapes, and embellishments to create your own unique tea cup designs. The possibilities are endless, so let your creativity shine and have fun crafting your own glitter foam sheet tea cups!
In conclusion, DIY glitter foam sheet tea cups are a fun and easy craft project that’s perfect for adding a touch of sparkle to your home decor. With just a few simple materials and a bit of creativity, you can create charming decorations that are sure to brighten up any space. So gather your supplies and get ready to craft your own delightful tea cups today!


