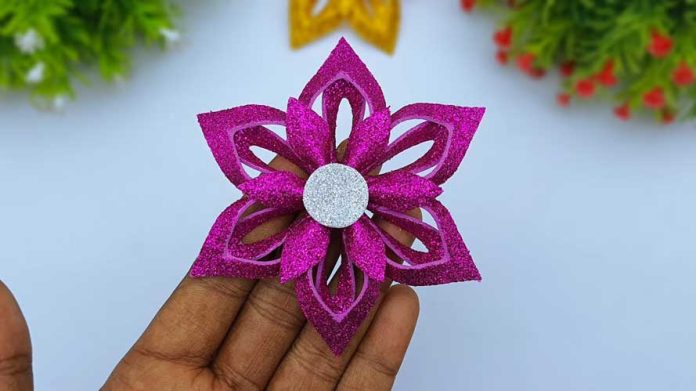
As the festive season approaches, there’s no better way to add a touch of winter wonderland to your home than by crafting your very own Christmas snowflakes. These delightful decorations are not only beautiful but also a fun and easy DIY project for all ages. In this step-by-step guide, we’ll walk you through the process of creating these charming snowflakes to adorn your home this holiday season.
Materials You’ll Need:
- Paper: You can use regular white printer paper, colored paper, or even patterned scrapbook paper for a unique twist.
- Scissors: A pair of sharp scissors is essential for cutting intricate designs.
- Ruler: A ruler helps you measure and cut straight lines.
- Pencil: A pencil for drawing your snowflake design (optional).
- Templates (optional): If you’re not confident in your freehand cutting skills, you can find printable snowflake templates online and use them as a guide.
Step 1: Prepare Your Workspace
Set up a clean and clutter-free workspace with ample lighting. Lay out all your materials, ensuring everything is within easy reach.
Step 2: Fold the Paper
Take a square sheet of paper (typically 8.5″ x 8.5″), and fold it diagonally to form a triangle. Make sure the edges align perfectly to create a sharp point at the bottom.
Step 3: Fold Again
Fold the triangle in half again, creating a smaller triangle. Ensure the edges are aligned neatly.
Step 4: Start Creating Your Design
This is where your creativity shines. Begin sketching a snowflake design on the folded triangle using a pencil. You can go for a traditional six-sided snowflake or experiment with different shapes and patterns. Remember, no two snowflakes are alike, so embrace your artistic freedom.
Step 5: Cut Along the Lines
Carefully cut along the lines of your design, making sure to keep the paper folded. Be precise with your cuts, as they will determine the final look of your snowflake.
Step 6: Unfold the Snowflake
Gently unfold your paper to reveal your beautiful snowflake. It might be a bit tricky to open the first time, but take your time to avoid tearing the delicate paper.
Step 7: Add Some Glitter (Optional)
For that extra holiday sparkle, you can lightly spray your snowflake with adhesive and sprinkle it with glitter. Allow it to dry before hanging.
Step 8: Hang Your Snowflakes
Use a transparent fishing line, thread, or thin ribbon to hang your snowflakes around your home. You can tape them to windows, hang them from the ceiling, or create a stunning snowflake garland.
Step 9: Admire Your Handiwork
Step back and admire your DIY Christmas snowflakes. These delightful decorations will infuse your home with a festive and magical atmosphere.
Step 10: Share the Joy
Now that you’ve mastered the art of making easy Christmas snowflakes, why not gather your family and friends for a crafting session? It’s a wonderful way to spread holiday cheer and create cherished memories together.
There you have it! Your home will be adorned with unique and beautiful DIY Christmas snowflakes that will dazzle and delight all who see them. Get creative, have fun, and let the holiday spirit shine through your handmade decorations. Happy crafting!
Step 11: Experiment with Different Sizes
Once you’ve mastered making standard-sized snowflakes, try varying the size of your paper squares to create a snowflake assortment. Smaller snowflakes can be used as tree ornaments, while larger ones make eye-catching window decorations.
Step 12: Personalize Your Snowflakes
Get even more creative by personalizing your snowflakes. You can write names, dates, or special messages on them using a fine-tip marker. These personalized snowflakes make fantastic gift tags or unique keepsakes for loved ones.
Step 13: Make 3D Snowflakes
Take your snowflake crafting to the next level by creating 3D snowflakes. Instead of using a single sheet of paper, make multiple snowflakes in decreasing sizes and stack them with foam adhesive dots or glue to create a layered effect.
Step 14: Host a Snowflake-Making Party
Invite friends and family over for a snowflake-making party. Provide various materials like colored paper, glitter, and markers, and encourage everyone to let their imaginations run wild. You can even have a contest to see who can create the most intricate snowflake design.
Step 15: Display Your Snowflakes Creatively
Think beyond the typical window or wall display. Attach your snowflakes to wreaths, hang them from chandeliers, or incorporate them into your holiday table centerpiece. There are endless possibilities for showcasing your handmade snowflakes.
Step 16: Preserve Your Snowflakes
To keep your snowflakes in pristine condition year after year, store them in a cardboard box with layers of tissue paper in between. This will prevent them from getting crushed or damaged during storage.
Step 17: Share Your Creations Online
Take photos of your DIY Christmas snowflakes and share them on social media or craft-sharing websites. Inspire others with your creativity and connect with fellow craft enthusiasts for more ideas and tips.
Step 18: Keep the Tradition Alive
Now that you’ve mastered the art of making easy Christmas snowflakes, make it an annual tradition. Each year, challenge yourself to create new and more intricate designs to add to your holiday decor collection.
Crafting your own Christmas snowflakes is not only a wonderful way to decorate your home but also a heartwarming way to embrace the holiday spirit and spend quality time with loved ones. So, gather your materials, let your creativity flow, and enjoy the joy of making beautiful snowflakes that will be cherished for years to come. Happy crafting and happy holidays!


