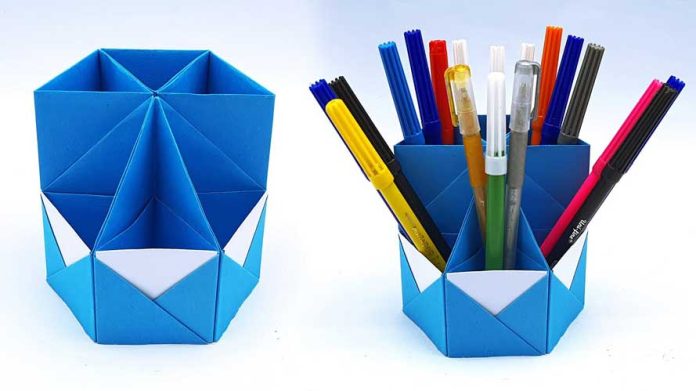
In need of a practical and stylish solution to organize your desk clutter? Look no further than this DIY tutorial on how to make an easy paper pen holder. Using simple materials and straightforward steps, you can create a functional and attractive pen holder to keep your workspace neat and organized. Join us as we explore the art of paper crafting and transform ordinary materials into a useful desk accessory. Let’s get started on this fun and practical project!
Materials Needed:
- Colored or patterned paper (cardstock works best for durability)
- Scissors
- Ruler
- Pencil
- Glue stick or craft glue
- Decorative materials such as stickers or markers (optional)
Step 1: Choose Your Paper
Select a sheet of colored or patterned paper to serve as the base for your pen holder. Consider choosing a sturdy paper like cardstock to ensure the pen holder maintains its shape and durability over time. You can opt for a single color or mix and match patterns for added visual interest.
Step 2: Measure and Cut
Using a ruler and pencil, measure and mark the dimensions for your pen holder. A common size is a rectangle with dimensions of approximately 4 inches (10 cm) by 6 inches (15 cm), but you can adjust the size according to your preferences. Once marked, carefully cut out the rectangle using scissors.
Step 3: Create Folds
With the cut-out rectangle laid flat on your work surface, use the ruler to score three evenly spaced vertical lines along the length of the paper. These lines will serve as guides for folding the paper into the shape of the pen holder. Be sure to press down firmly with the ruler to create distinct creases.
Step 4: Fold Into Shape
Fold the paper along the scored lines to create three vertical sections. The outer sections will serve as the sides of the pen holder, while the middle section will form the base. Use your fingers to press down firmly along the folds to ensure they are crisp and secure.
Step 5: Secure With Glue
Apply glue along one of the side edges of the paper, then overlap the other side edge to form a cylindrical shape. Press down firmly to secure the edges together and hold them in place until the glue sets. You may also apply glue along the bottom edge of the paper and fold it up to reinforce the base of the pen holder.
Step 6: Customize (Optional)
Get creative and personalize your paper pen holder by adding decorative elements such as stickers, markers, or cut-out shapes. You can write your name or favorite quotes, or decorate the holder with patterns and designs that reflect your style and personality.
Step 7: Let Dry and Enjoy
Allow the glue to dry completely before using your newly crafted paper pen holder. Once dry, place it on your desk or workspace and fill it with your favorite pens, pencils, and other stationery items. Admire your handiwork and revel in the satisfaction of creating a practical and stylish organizational solution.
Conclusion:
With just a few simple materials and easy-to-follow steps, you can create a DIY paper pen holder that adds functionality and charm to your workspace. Whether you’re a student, professional, or hobbyist, this craft project is sure to come in handy for keeping your desk tidy and your pens within reach. So gather your materials, unleash your creativity, and enjoy the satisfaction of crafting something useful with your own two hands!


