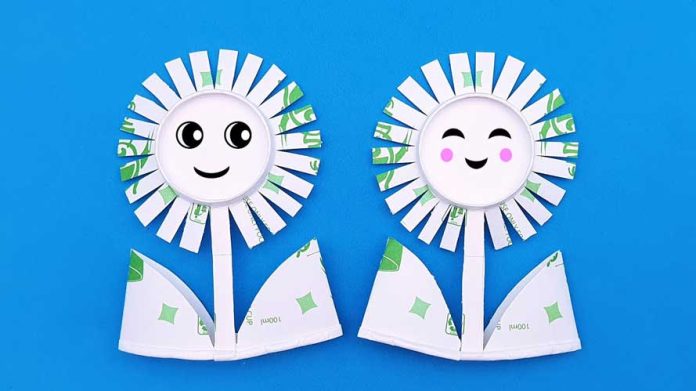
Looking to add a touch of floral charm to your living space? Why not try making your very own Paper Cup Flowers? This delightful and eco-friendly craft project is not only fun and easy, but it also allows you to upcycle paper cups into beautiful blooms that can brighten up any room. Whether you’re a seasoned DIY enthusiast or a crafting novice, follow this step-by-step guide to create stunning Paper Cup Flowers that will leave your friends and family in awe.
Materials Needed:
Before we dive into the crafting process, gather the following materials:
- Paper cups (unused or recycled)
- Craft paint or acrylic paint (assorted colors)
- Paintbrushes
- Craft paper or colored cardstock
- Scissors
- Glue gun and glue sticks
- Green floral wire or pipe cleaners
- Green tape or washi tape
- Pencil
- Ruler
- Flower templates (optional)
- Buttons, beads, or other embellishments (optional)
Step-by-Step Guide:
Step 1: Preparing the Paper Cups
Start by cleaning the paper cups if they are used. Remove any stickers or labels and ensure they are dry and free from any residue. You can use plain white paper cups or opt for colored ones to add variety to your flower arrangement.
Step 2: Painting the Cups
Take your craft or acrylic paints and paint the outside of the paper cups in various colors. Let your creativity flow and experiment with different hues to make the flowers more vibrant. Allow the paint to dry completely before proceeding to the next step.
Step 3: Creating Flower Petals
To create the flower petals, use craft paper or colored cardstock. Draw or trace flower petal shapes onto the paper using a pencil and ruler. You can find printable templates online if you prefer. Cut out the petals carefully with scissors. The number of petals you cut will determine the fullness of your paper cup flower.
Step 4: Assembling the Paper Cup Flowers
Take a painted paper cup and apply a small amount of glue on the base of the cup. Attach the flower petals one by one around the rim of the cup, pressing gently to secure them in place. Overlap the petals slightly to create a natural-looking flower. Continue adding petals until you have completed one layer.
Step 5: Adding the Flower Center
For the flower center, you can use a button, bead, or a rolled-up piece of colored paper. Apply glue to the center of the flower and attach the chosen embellishment. This will add depth and character to your Paper Cup Flower.
Step 6: Making the Flower Stem
Take a green floral wire or a pipe cleaner and cut it to your desired stem length. Insert the wire through the drinking hole at the bottom of the paper cup and push it upwards until it reaches the flower’s base. Use a glue gun to secure the wire in place.
Step 7: Wrapping the Stem
To give your flower stem a more realistic look, wrap it with green floral tape or washi tape. Start from the base of the flower and carefully wind the tape around the wire, working your way downwards. This step adds a finishing touch to your Paper Cup Flower.
Step 8: Repeating the Process
Repeat Steps 2 to 7 to create a bouquet of Paper Cup Flowers in various colors and sizes. Mix and match different petal shapes and colors to make each flower unique.
Step 9: Arranging Your Paper Cup Flowers
Once you’ve made multiple Paper Cup Flowers, it’s time to arrange them into a beautiful bouquet. Place them in a vase or container filled with decorative stones or pebbles to hold the stems in place.
Conclusion:
Congratulations! You’ve mastered the art of creating stunning Paper Cup Flowers. Not only did you recycle and upcycle paper cups, but you also transformed them into beautiful floral masterpieces that can enliven any space. Whether you’re looking for a fun craft activity for yourself or a bonding experience with family and friends, making Paper Cup Flowers is a fulfilling and rewarding endeavor. Embrace your creativity, experiment with colors and shapes, and let your handmade blooms add a touch of natural beauty to your home decor. Happy crafting!


