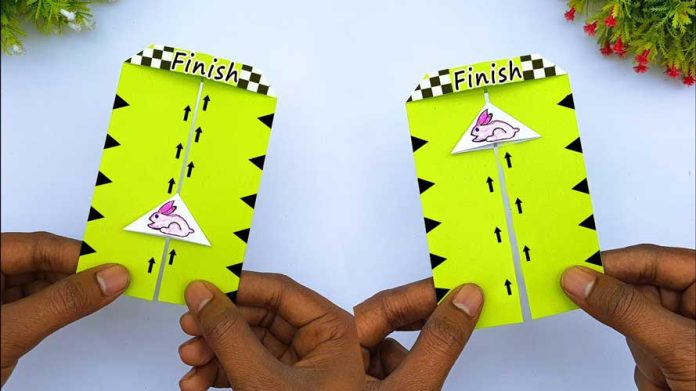
Are you on the lookout for a simple yet entertaining DIY project? Look no further! In this step-by-step guide, we’ll show you how to create your very own Paper Running Race Toy. This budget-friendly and amusing craft is perfect for both kids and the young at heart. So, let’s roll up our sleeves and dive into the world of handmade fun with this delightful DIY paper toy!
Materials You’ll Need:
- Colored paper or construction paper
- Drinking straws
- Wooden clothespins
- Googly eyes
- Glue
- Markers or colored pens
- Craft scissors
- Small rubber bands
Step 1: Gather Your Materials
Before you start crafting, make sure you have all the necessary materials within reach. This project is all about simplicity, so don’t worry about any fancy tools – just gather your craft essentials.
Step 2: Cut and Fold the Paper
Take the colored paper and cut it into rectangular strips. These strips will serve as the bodies of your running race characters. Fold each strip accordion-style to create a zig-zag pattern, making sure to leave a flat base at the bottom for stability.
Step 3: Attach the Clothespin Legs
Open the wooden clothespins and attach them to the flat base of each folded paper strip. This creates the legs of your running race characters. Make sure to leave a bit of the paper extending above the clothespin for the upper body.
Step 4: Add Googly Eyes and Facial Features
Now, let’s bring your running race characters to life! Use glue to attach googly eyes near the top of the folded paper strip. Get creative by drawing facial features like smiles or funny expressions with markers or colored pens.
Step 5: Insert Drinking Straws for Stability
Take the drinking straws and cut them into small segments. Insert each straw segment onto the clothespin legs, ensuring they provide stability and allow the paper characters to stand upright. This step also makes your paper toy glide smoothly as it races.
Step 6: Create a Race Track
Set up a race track using a flat surface like a table or the floor. You can use colored tape or draw lines with markers to mark the racecourse. Get ready for some friendly competition!
Step 7: Wind Up and Race!
Place your Paper Running Race Toy at the starting line, wind up the clothespin legs by twisting them, and let go! Watch with delight as your colorful paper characters zoom and race along the track. Experiment with different winding techniques to see how it affects their speed.
Step 8: Customize and Decorate
Personalize your running race characters by adding accessories or decorations. Get creative with patterns, stickers, or even tiny hats to make each character unique. This step is all about letting your imagination run wild!
Step 9: Enjoy the Fun!
Gather friends and family to join in the excitement of your DIY Paper Running Race Toy. You can host races, create obstacle courses, or simply enjoy the whimsical charm of your handcrafted paper characters in motion.
Creating a DIY Paper Running Race Toy is not only a budget-friendly craft but also a delightful way to bring joy and entertainment to your day. So, grab your materials, unleash your creativity, and let the races begin!


