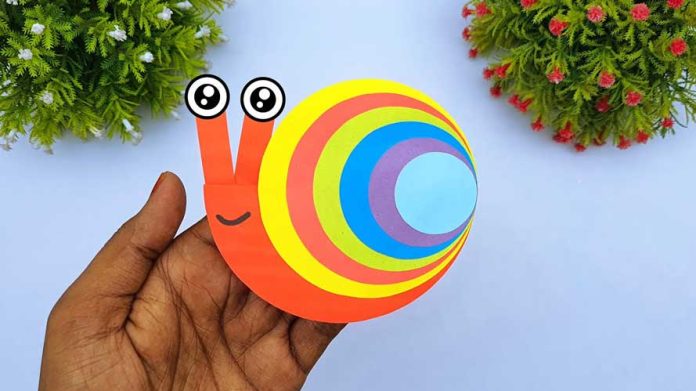
Unleash your creativity with these fun and colorful DIY Rainbow Paper Snail making ideas! Perfect for kids and adults alike, these whimsical paper snails are an excellent craft project for a rainy day or a creative afternoon. In this guide, we’ll take you through the steps to create your very own rainbow paper snails. Let’s get started on this delightful and vibrant project!
Materials You’ll Need:
- Colorful construction paper or craft paper
- Scissors
- Glue stick or liquid glue
- Markers or pens
- Googly eyes (optional)
- Ruler
- Pencil
Step 1: Gather Your Materials
Ensure you have all the necessary materials before starting. Choose a variety of colorful construction paper to make your snails vibrant and eye-catching.
Step 2: Cut the Paper Strips
Using a ruler and pencil, measure and mark strips of paper. Each strip should be about 1 inch wide and 6 inches long. Cut several strips in different colors to create the rainbow effect.
Step 3: Create the Snail’s Shell
Take one strip of each color and arrange them in a rainbow order. Apply a small amount of glue to one end of each strip and stack them together, pressing firmly to ensure they stick. Once the glue is dry, start rolling the strips together from the glued end to form a coil, which will be the snail’s shell. Secure the end with a dot of glue.
Step 4: Make the Snail’s Body
Cut a strip of paper about 1 inch wide and 4 inches long from another piece of paper (a color that complements the shell). This will be the snail’s body. Fold one end of the strip about 1/2 inch to create a tab.
Step 5: Attach the Shell to the Body
Apply glue to the tab on the snail’s body and attach it to the bottom of the snail’s shell. Ensure the body is positioned in a way that the shell can stand upright.
Step 6: Add the Snail’s Head and Antennae
Cut a small oval shape from the same paper used for the body to create the snail’s head. Draw a smiley face and any other facial features using markers or pens. Attach googly eyes if you have them for a fun touch. Glue the head to the front of the body.
For the antennae, cut two small strips of paper, about 1/4 inch wide and 2 inches long. Curl one end of each strip using a pencil. Attach the straight ends to the back of the snail’s head with glue.
Step 7: Customize Your Snail
Get creative with your snail by adding details and decorations. You can draw patterns on the shell, add glitter, or use stickers. Let your imagination run wild!
Step 8: Display Your Rainbow Paper Snail
Your DIY rainbow paper snail is now complete! Find a special spot to display your colorful creation. You can also make a family of snails in different sizes and colors for a fun and cheerful display.
Additional Tips:
- Use different lengths and widths of paper strips to create snails of various sizes.
- Experiment with different color combinations for unique and personalized snails.
- This project can be a great activity for kids’ parties or classroom crafts.
Creating rainbow paper snails is an enjoyable and easy craft that brings joy and color into your day. By following these DIY Rainbow Paper Snail making ideas, you’ll be able to create charming and delightful snails that brighten up any space. Happy crafting!


