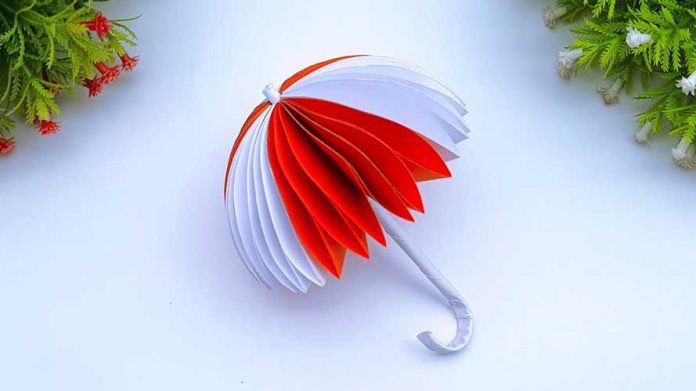
Are you searching for a fun and educational DIY school project idea that will engage students’ creativity and dexterity? Look no further than this guide, where we’ll delve into the world of handmade paper craft umbrellas. Perfect for students of all ages, this project combines artistry, fine motor skills, and learning about weather and seasons. Join us as we explore step-by-step instructions to create charming paper umbrellas that are sure to brighten any classroom or home. Let’s embark on this creative journey together and craft something truly special.
Materials Needed:
- Colorful craft paper or cardstock
- Scissors
- Pencil
- Ruler
- Glue stick or craft glue
- Decorative materials such as sequins, stickers, or markers (optional)
Step 1: Choose Your Paper
Select vibrant and sturdy craft paper or cardstock in colors that evoke the cheerfulness of a sunny day. Consider using a variety of colors to create a visually appealing umbrella that stands out.
Step 2: Cut Out Umbrella Shapes
Using a pencil and ruler, draw a large semi-circle on your chosen paper to represent the canopy of the umbrella. Carefully cut out the semi-circle shape using scissors. This will serve as the main body of your paper craft umbrella.
Step 3: Create the Handle
To make the umbrella handle, cut a narrow strip of paper from a contrasting color. Roll the strip into a tight cylinder to form the handle shape. Secure the rolled paper with glue and trim any excess if needed.
Step 4: Attach the Handle
Apply glue to one end of the handle and affix it to the center bottom of the paper umbrella canopy. Press down firmly to ensure a secure bond. Allow the glue to dry completely before proceeding.
Step 5: Decorate Your Umbrella
Let your creativity soar as you adorn your paper craft umbrella with decorative elements. Add sequins, stickers, or draw intricate designs using markers to embellish the canopy and handle. This is where students can showcase their individuality and artistic flair.
Step 6: Fold and Display
Once the glue has dried and your paper craft umbrella is complete, gently fold the canopy in half to create a classic umbrella shape. Stand the umbrella upright and display it proudly in the classroom or at home as a cheerful decoration.
Step 7: Explore Learning Opportunities
Use the paper craft umbrella project as an opportunity to explore various educational concepts. Discuss the role of umbrellas in protecting against rain and sun, learn about weather patterns and seasons, or incorporate math by measuring and comparing umbrella sizes.
Step 8: Share and Celebrate
Encourage students to share their handmade paper craft umbrellas with classmates, teachers, and family members. Host a mini exhibition or presentation where students can showcase their creations and share the inspiration behind their designs.
Conclusion:
Creating handmade paper craft umbrellas is not only a fun and engaging DIY school project idea but also a valuable learning experience. Through this creative endeavor, students can develop fine motor skills, express their creativity, and deepen their understanding of weather-related concepts. So gather your materials, unleash your imagination, and embark on this delightful journey of crafting and learning. With each colorful umbrella, you’ll create a ray of sunshine that brightens hearts and minds alike!


