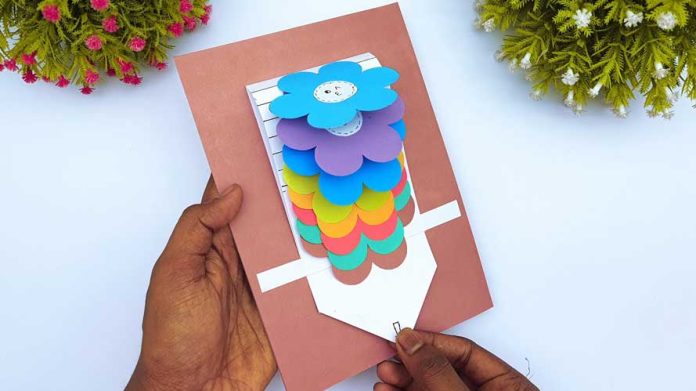
Creating a DIY Surprise Message Card is a wonderful way to express your love and affection for someone special. These personalized cards are not only heartfelt but also a delightful surprise for the recipient. In this comprehensive step-by-step guide, we will walk you through the process of crafting your very own DIY Surprise Message Card, from selecting the materials to adding the final touches. Let’s get started!
Step 1: Gather Your Materials
Before you begin, make sure you have all the necessary materials on hand. You’ll need:
- Cardstock or thick paper: Choose a sturdy material for the card’s base.
- Decorative paper or scrapbooking sheets: These will add flair and personality to your card.
- Scissors and craft knives: To cut out shapes and intricate designs.
- Glue or double-sided tape: For adhering various elements together.
- Ruler and pencil: To measure and mark the card’s dimensions.
- Markers, pens, and colored pencils: For adding personalized messages and designs.
- Stamps and ink pads (optional): If you prefer stamping designs instead of drawing.
- Embellishments: Ribbons, stickers, glitter, and other decorative elements enhance the card.
Step 2: Choose a Card Design
Decide on the style and theme of your card. It could be a traditional foldable card, a pop-up card, or a slider card with hidden messages. Keep in mind the recipient’s preferences and the occasion for which you’re creating the card.
Step 3: Create the Card Base
Using cardstock or thick paper, cut out the desired size for your card. Typically, a standard greeting card size of 5×7 inches works well. Fold the paper in half to form the card’s base.
Step 4: Add Decorative Elements
Cut and glue the decorative paper or scrapbooking sheets onto the front and inside of the card. You can also layer different patterns and textures to add depth and visual appeal.
Step 5: Personalize with Messages
This is the heart of the Surprise Message Card! Write or print meaningful messages on separate small pieces of paper. These messages can be expressions of love, memories, or even riddles that lead to a surprise gift.
Step 6: Incorporate Pop-Up Elements (Optional)
If you’ve chosen a pop-up card design, create the pop-up mechanism. Cut slits on the fold of the card and carefully fold the paper to create the pop-up effect. Attach your personalized messages to the pop-up parts.
Step 7: Design the Cover
The card cover is the first thing the recipient will see, so make it visually appealing. You can add a catchy title, use calligraphy for the recipient’s name, or include a small photo that holds significance.
Step 8: Assemble the Card
Carefully adhere all the elements onto the card base. Make sure everything is secure and aligned properly. Double-check that the pop-up elements work smoothly if you included them.
Step 9: Add Finishing Touches
Use markers, pens, or colored pencils to add any final touches or doodles to the card. Embellish with ribbons, stickers, or glitter to make it extra special.
Step 10: Deliver Your Surprise Message Card
Once your DIY Surprise Message Card is complete, place it in an envelope and deliver it with love. The joy and excitement on the recipient’s face will make all your efforts worthwhile.
Conclusion:
Crafting a DIY Surprise Message Card is a fantastic way to show someone you care. With this step-by-step guide, you can create a unique and heartfelt card that will leave a lasting impression. Get creative, pour your emotions into the messages, and enjoy the process of making something truly special for your loved one. Happy crafting!


