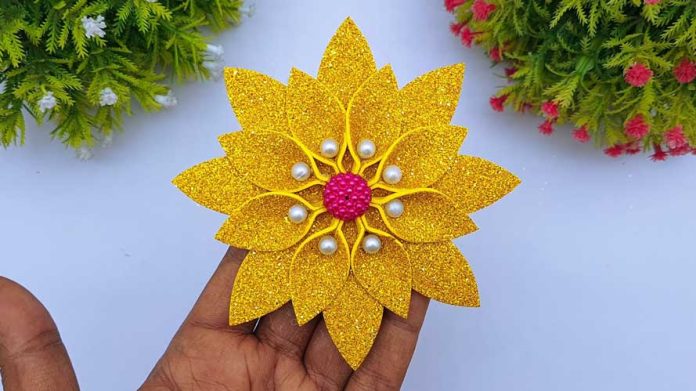
Are you looking to add a touch of elegance and charm to your home decor? Look no further! DIY wall decoration flower making is a fantastic way to infuse your living space with creativity and vibrancy. Whether you’re a crafting novice or a seasoned DIY enthusiast, these step-by-step flower making ideas will inspire you to beautify your walls with stunning floral arrangements.
Materials Needed:
Before we dive into the crafting process, let’s gather the materials you’ll need for this project:
- Colored craft paper or cardstock
- Scissors
- Glue gun or craft glue
- Floral wire or pipe cleaners
- Pencil
- Ruler
- Buttons, beads, or other embellishments (optional)
Step 1: Choose Your Flower Design
The first step in creating your DIY wall decoration is to choose the type of flowers you want to make. You can opt for classic roses, whimsical daisies, or exotic tropical blooms – the choice is yours! Browse online or in craft stores for inspiration, or let your imagination run wild and come up with your own unique designs.
Step 2: Prepare Your Materials
Once you’ve selected your flower design, gather your materials and lay them out on a clean, flat surface. Make sure you have enough paper in your chosen colors to create the desired number of flowers. If you’re using embellishments like buttons or beads, have those handy as well.
Step 3: Cut Out Your Flower Shapes
Using your pencil and ruler, trace the outline of your chosen flower onto the colored craft paper or cardstock. Carefully cut out the shapes using scissors, making sure to follow the lines as accurately as possible. Repeat this step for each flower you plan to make.
Step 4: Create Your Flower Petals
Once you have your flower shapes cut out, it’s time to add some dimension. Using scissors, make small cuts along the edges of each flower shape to create petals. Be careful not to cut all the way to the center – you want to leave enough space for the flower to hold its shape.
Step 5: Assemble Your Flowers
Now comes the fun part – assembling your flowers! Take one of your flower shapes and apply a small dab of glue to the center. Place a piece of floral wire or a pipe cleaner on the glue, then press another flower shape on top, sandwiching the wire in between. Hold the two pieces together until the glue sets.
Step 6: Add Embellishments (Optional)
If you want to add a bit of flair to your flowers, now’s the time to do it! Glue buttons, beads, or other embellishments to the center of each flower for an extra pop of color and texture.
Step 7: Arrange Your Flowers
Once your flowers are assembled and any embellishments are added, it’s time to arrange them into a beautiful wall decoration. Play around with different combinations and placements until you find a design you love.
Step 8: Attach Your Flowers to the Wall
Using either craft glue or a glue gun, attach your flowers to the wall in your desired arrangement. Be sure to press them firmly against the surface to ensure they stay in place.
Step 9: Step Back and Admire Your Handiwork
Congratulations – you’ve successfully created your own DIY wall decoration using handmade flowers! Step back and admire your handiwork, and bask in the compliments from friends and family who are sure to be impressed by your creativity.
Step 10: Experiment and Have Fun
Don’t be afraid to experiment with different flower designs, colors, and arrangements to create a truly unique wall decoration that reflects your personal style. And most importantly, have fun with the process – crafting should be an enjoyable and rewarding experience!
In conclusion, DIY wall decoration flower making is a wonderful way to add beauty and charm to any room in your home. By following these step-by-step instructions and letting your creativity shine, you can create stunning floral arrangements that will be the envy of all your guests. So gather your materials, roll up your sleeves, and let the crafting begin!


