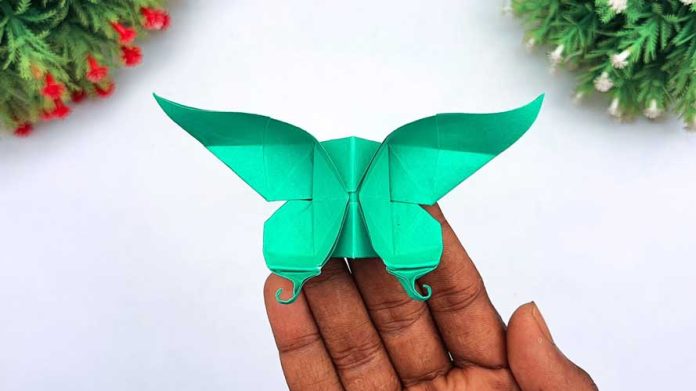
Origami, the art of paper folding, has captivated people around the world for centuries. Among the many captivating creations, the origami butterfly holds a special place. With its delicate wings and graceful form, it represents beauty and transformation. In this comprehensive step-by-step guide, we will walk you through the process of folding an origami butterfly in the easiest way possible. Let’s dive in!
Materials Needed:
- Square origami paper (preferably 6×6 inches)
- A flat, clean surface to work on
- Patience and a sense of creativity
Step 1: Choosing the Right Paper To begin, select a square piece of origami paper. The size mentioned above is recommended for beginners, as it is easier to handle. However, feel free to experiment with different sizes and patterns to add your personal touch to the final creation.
Step 2: Preparing the Paper Place the origami paper on a flat surface, ensuring that one corner points toward you, forming a diamond shape. Smooth out any wrinkles or creases, as this will affect the final outcome.
Step 3: Folding the Bottom Corner Fold the bottom corner of the paper up to meet the top corner, creating a triangle shape. Make sure the edges are aligned perfectly before creasing the fold. This triangle will serve as the foundation for your butterfly.
Step 4: Creating a Diamond Shape Unfold the triangle and then rotate it 90 degrees clockwise. Next, fold the paper in half diagonally, bringing the bottom corner to the top corner. You will end up with a smaller triangle, resembling a diamond shape.
Step 5: Shaping the Wings With the diamond shape in front of you, fold the right corner towards the center, aligning it with the top corner. Repeat this step with the left corner, creating a narrower diamond with the top point exposed.
Step 6: Folding the Wings Take the top flap of the diamond and fold it downwards, aligning the top edge with the bottom edge of the diamond. Flip the paper over and repeat the same fold on the other side. This will form the butterfly’s wings.
Step 7: Creating the Butterfly’s Body Fold the bottom point of the diamond upwards, stopping just below the tip of the wings. This will create a small triangle, which will serve as the butterfly’s body.
Step 8: Final Touches To complete the origami butterfly, carefully unfold the wings, gently separating them to give the butterfly a three-dimensional appearance. Adjust the wings and body as desired, ensuring the butterfly stands upright.
Conclusion:
Congratulations! You have successfully folded an origami butterfly using the easy step-by-step guide provided. The art of origami offers endless possibilities for creativity and self-expression. Practice and experiment with different papers and sizes to create a beautiful array of origami butterflies. Enjoy the process, and let your imagination take flight with this timeless art form.
Remember, origami is a skill that develops with practice. So don’t be discouraged if your first attempt doesn’t meet your expectations. Keep trying, and soon you’ll master the art of folding origami butterflies effortlessly. Happy folding!


