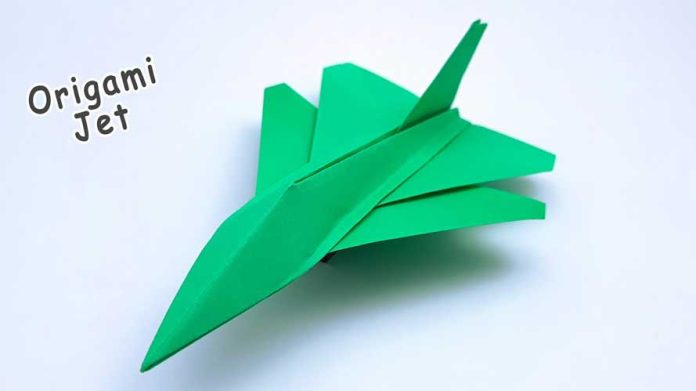
Origami, the ancient Japanese art of paper folding, offers endless possibilities for creativity and craftsmanship. In this tutorial, we’ll explore how to fold an origami jet fighter, a sleek and dynamic model that’s sure to impress. Whether you’re a beginner or an experienced origami enthusiast, follow along with our step-by-step guide to create your own miniature jet fighter with just a sheet of paper. Let’s soar into the world of origami and fold our very own jet fighter!
Materials Needed:
- Square sheet of paper (preferably black or gray for a realistic look)
- Clear workspace
Step 1: Prepare Your Paper Start by ensuring you have a square sheet of paper. If your paper is not already square, you can easily make it square by folding and tearing or cutting off the excess. A standard size of 6×6 inches or 15×15 centimeters works well for this project.
Step 2: Fold Diagonally Fold the paper in half diagonally to form a triangle. Crease the fold well and then unfold it to reveal a diagonal crease running through the center of the paper.
Step 3: Fold the Top Corners Fold the top corners of the triangle down to meet at the center crease. This will create a smaller triangle with a flat bottom edge.
Step 4: Fold the Bottom Point Fold the bottom point of the triangle up, aligning it with the top edge of the folded corners. This will create a triangular shape with a pointed tip at the bottom and two folded flaps at the top.
Step 5: Fold the Flaps Down Fold the two top flaps down along the creases created in Step 3. These flaps will become the wings of the jet fighter, so adjust them to your desired angle for the wingspan.
Step 6: Fold the Wings Fold the wings down along the bottom edge of the body, creating a triangular shape with the wings angled downward. This will give your jet fighter a sleek and aerodynamic appearance.
Step 7: Fold the Tail Fold the bottom point of the jet fighter up slightly to create a tail fin. This will add stability and balance to the model, mimicking the tail of a real jet fighter.
Step 8: Shape the Jet Fighter Gently shape and adjust the wings, body, and tail of the jet fighter to achieve your desired look. You can curve the wings upward for a more dynamic appearance or leave them straight for a classic fighter jet silhouette.
Step 9: Finishing Touches Once you’re satisfied with the shape of your origami jet fighter, give it a final crease along all the folds to secure them in place. You can also add details such as cockpit windows or engine exhausts with a pen or marker for extra realism.
Step 10: Display Your Creation Your origami jet fighter is now complete and ready to be displayed with pride! Place it on a shelf, desk, or bookcase to showcase your folding skills and admire the sleek lines of your miniature aircraft.
Conclusion: With just a sheet of paper and a few simple folds, you’ve created a stunning origami jet fighter that’s sure to impress. Whether you’re a novice or a seasoned folder, this project offers a fun and rewarding way to explore the art of origami and unleash your creativity. So grab some paper and start folding – your high-flying creation awaits!


