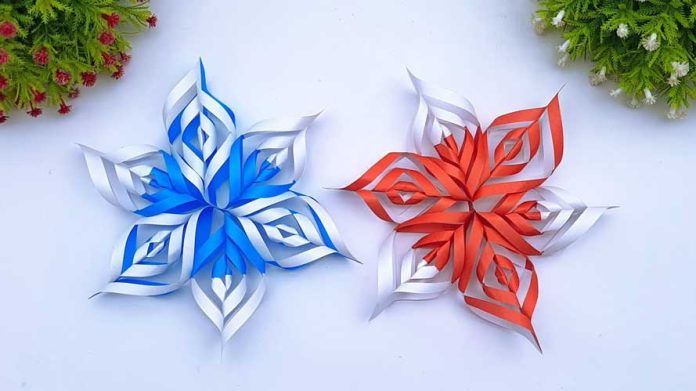
The holiday season brings with it the magic of snowflakes, and what better way to capture that enchantment than by crafting your very own 3D Christmas snowflakes? These beautiful decorations can add a touch of winter wonderland to your home, whether hung on the Christmas tree, adorning windows, or as part of a festive centerpiece. In this step-by-step guide, we’ll take you through the process of creating stunning 3D snowflakes that will impress your guests and make your holiday decor truly special.
Materials Needed:
Before we begin, gather the materials required to make your 3D Christmas snowflakes:
- White paper or cardstock
- Scissors
- Pencil
- Ruler
- Glue stick or craft glue
- Hole punch (optional)
- String or ribbon for hanging (optional)
- Optional: Glitter, sequins, or craft embellishments for extra sparkle
Step 1: Design Your Snowflake
Begin by designing your snowflake on a piece of white paper. Snowflakes have six sides, so draw a six-pointed star, ensuring that each arm is of equal length. This will serve as your snowflake’s template.
Step 2: Create Copies of the Template
Once you have your snowflake template, trace it onto additional pieces of white paper or cardstock. You’ll need at least six copies for each 3D snowflake you want to make.
Step 3: Cut Out the Snowflake Arms
Using your scissors, carefully cut along the lines of each traced snowflake to create six individual arms.
Step 4: Add Decorative Elements (Optional)
This step allows you to add some extra sparkle to your snowflake. Apply glue to the arms and sprinkle glitter, attach sequins, or use craft embellishments to create a unique and dazzling effect.
Step 5: Fold the Snowflake Arms
Now, take each arm and fold it in half lengthwise, creating a crease in the middle. This fold will give your snowflake its three-dimensional shape.
Step 6: Assemble the Snowflake
With all the arms folded, it’s time to assemble your 3D snowflake. Apply glue along one side of an arm’s fold and carefully stick it to the corresponding side of another arm. Repeat this process until all six arms are connected, forming a 3D snowflake shape.
Step 7: Reinforce the Snowflake
To ensure your snowflake stays intact, add a dab of glue at the center where all six arms meet. This will secure the snowflake and prevent it from coming apart.
Step 8: Optional – Add a Hanging Loop
If you wish to hang your 3D snowflake, punch a small hole near one of the snowflake’s points and thread a string or ribbon through it. Tie a knot to create a loop for hanging.
Step 9: Display and Enjoy!
Congratulations! Your 3D Christmas snowflake is complete. Now, find the perfect spot to showcase your creation. Hang it on your Christmas tree, tape it to windows, or create a beautiful snowflake garland. The possibilities are endless, and the results are sure to impress everyone who sees your handiwork.
Conclusion:
Crafting 3D Christmas snowflakes is a delightful and rewarding way to embrace the holiday spirit and add a personalized touch to your festive decor. With just a few simple materials and some creative flair, you can create stunning snowflakes that capture the magic of the winter season. Gather your friends and family, and embark on this crafting journey together to make your holiday decor truly memorable. Have fun creating these beautiful 3D snowflakes and let the festive cheer shine bright in your home!


