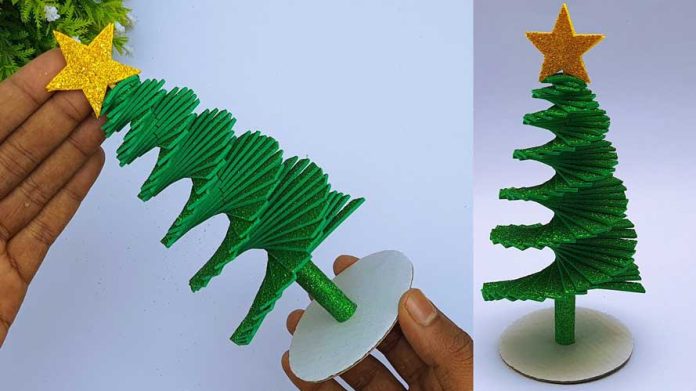
Bring the spirit of the season into your home with our step-by-step guide on “How to Make Christmas Tree at Home.” Dive into the joy of crafting as we explore creative and budget-friendly ways to create a personalized Christmas tree that captures the magic of the holidays.
Materials You’ll Need:
To embark on this heartwarming crafting journey, gather the following materials:
- Cardboard or foam board: For the tree structure.
- Green felt or fabric: To cover the tree.
- Scissors: Sharp and precise for cutting materials.
- Decorative materials: Ribbons, ornaments, or any embellishments you desire.
- Glue or double-sided tape: To secure materials in place.
- Optional: Lights or garlands: To add an extra festive touch.
Now, let’s dive into the step-by-step process of creating a Christmas tree at home:
Step 1: Cut the Tree Shape
Using the cardboard or foam board, cut out the shape of a Christmas tree. Decide on the size that fits your space and preferences. Make sure the edges are smooth and symmetrical.
Step 2: Cover with Green Felt or Fabric
Drape green felt or fabric over the cardboard or foam board, ensuring it covers the entire tree shape. Trim any excess material and secure it in place using glue or double-sided tape. This creates the lush appearance of your Christmas tree.
Step 3: Create a Tree Stand (Optional)
If you wish to make your tree freestanding, cut out a rectangular piece of cardboard or foam board to serve as the tree stand. Attach it to the bottom of the tree with glue or tape, providing stability.
Step 4: Decorate with Ornaments and Ribbons
Let your creativity shine by decorating your homemade tree with ornaments, ribbons, and any other decorative materials you have on hand. Arrange them in a visually pleasing manner, creating a personalized and festive look.
Step 5: Optional: Add Lights or Garland
For an extra touch of holiday magic, consider adding string lights or garlands to your homemade Christmas tree. Secure them in place with tape or wind them around the tree to create a warm and inviting glow.
Step 6: Create a Tree Topper (Optional)
Craft a tree topper using materials like cardboard, felt, or even a small decorative item. Place it at the top of your tree to complete the festive look.
Step 7: Display Your Homemade Christmas Tree
Find the perfect spot to showcase your handmade Christmas tree. Whether it’s on a tabletop, as a centerpiece, or in a corner of your living room, let your creation spread holiday cheer.
Conclusion:
Crafting a Christmas tree at home is a heartwarming and budget-friendly way to infuse your space with festive joy. Follow this step-by-step guide to create a personalized and unique Christmas tree that becomes a cherished part of your holiday traditions. Happy crafting!


