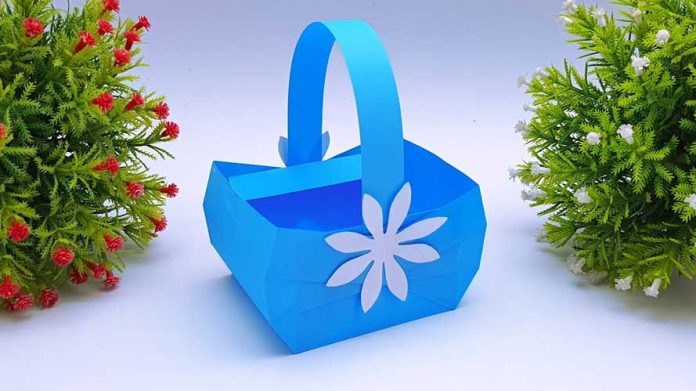
Easter is just around the corner, and what better way to celebrate than by creating your own Easter baskets from paper? In this step-by-step guide, we’ll show you how to craft charming and eco-friendly Easter baskets using simple materials. Whether you’re looking for a fun activity to do with kids or want to add a personal touch to your Easter decor, making paper Easter baskets is sure to bring joy to your celebrations. So, let’s hop right into it!
Materials You’ll Need:
- Colored or patterned paper
- Scissors
- Ruler
- Pencil
- Glue or double-sided tape
- Decorative ribbon or twine (optional)
- Stickers, markers, or other embellishments (optional)
Step 1: Choose Your Paper
Select colorful or patterned paper to give your Easter baskets a festive look. You can use solid colors for a classic feel or opt for fun prints like polka dots or stripes for a whimsical touch. Get creative with your choices to match your Easter theme or personal style.
Step 2: Measure and Cut
Using a ruler and pencil, measure and mark the paper according to the size you want for your Easter basket. A square or rectangular piece of paper works well for a traditional basket shape. Cut out the paper along the marked lines using scissors, ensuring straight edges for a neat finish.
Step 3: Fold and Crease
Once you have your paper cut to size, it’s time to fold and crease the edges to create the basket shape. Fold up the sides of the paper to form the walls of the basket, making sure the corners meet neatly. Use your fingers or a ruler to make sharp creases along the folds for a sturdy structure.
Step 4: Secure the Edges
Apply glue or double-sided tape along the overlapping edges of the paper to secure them in place. Press down firmly to ensure a strong bond. If you’re using glue, allow it to dry for a few moments before proceeding to the next step.
Step 5: Create the Handle
To make a handle for your Easter basket, cut a long strip of paper from the same material or a complementary color. Fold the strip in half lengthwise to reinforce it, then attach the ends to the inside of the basket using glue or tape. Make sure the handle is securely attached and positioned evenly on both sides of the basket.
Step 6: Decorate and Embellish
Now comes the fun part – decorating your Easter basket! Get creative with stickers, markers, or other embellishments to add personality and flair to your creation. You can also tie a decorative ribbon or twine around the handle for an extra touch of charm.
Step 7: Fill with Goodies
Once your Easter basket is complete, fill it with an assortment of treats, goodies, or small gifts. Traditional Easter favorites include chocolate eggs, candies, toys, and even handmade crafts. Get creative with your selection to delight friends and family.
Step 8: Share and Enjoy
Your handmade paper Easter basket is now ready to be shared and enjoyed! Whether you use it as a centerpiece for your Easter table, a gift for a loved one, or a fun way to collect eggs during an Easter egg hunt, your paper creation is sure to spread joy and cheer.
Making Easter baskets from paper is a delightful way to get into the spirit of the season while unleashing your creativity. With just a few simple materials and a bit of imagination, you can craft charming baskets that add a special touch to your Easter festivities. So, gather your supplies and start crafting – your Easter celebration awaits!


