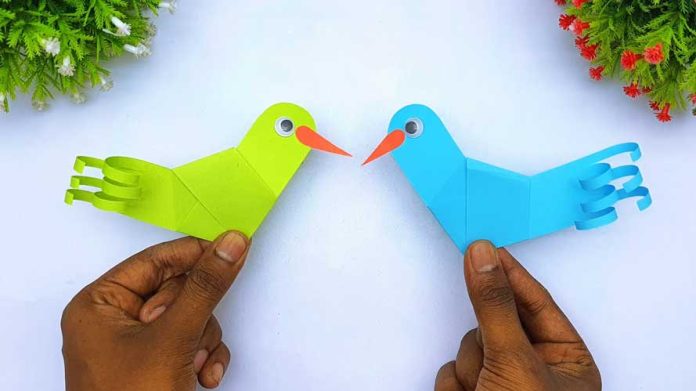
How To Make Easy Paper Birds
Paper crafting is a delightful hobby that allows you to explore your creativity and create beautiful artwork. One of the most popular paper craft projects is making easy paper birds through the art of origami. In this step-by-step guide, we will walk you through the process of creating stunning paper birds from scratch. So, grab your favorite paper, and let’s get started on this artistic journey!
Step 1: Gather Your Materials Before we begin, make sure you have all the necessary materials at hand. You will need:
- Origami paper (preferably square-shaped)
- Scissors (optional)
- Pencil (optional)
- Eraser (optional)
Step 2: Choose Your Paper Origami paper comes in various colors, patterns, and sizes. Select the paper that best suits your creative vision. Traditionally, square origami paper is used, but you can also cut a square from regular paper or use patterned paper to add a unique touch.
Step 3: Start with a Basic Bird Design Let’s begin with a simple bird design, like a crane or a dove. These birds are perfect for beginners and serve as a foundation for more complex creations. Follow these steps to make a basic origami bird:
- Fold the square paper in half diagonally to create a triangle.
- Unfold the paper and fold it diagonally in the opposite direction to form another triangle.
- Unfold the paper again. You should see an “X” crease in the center.
- Bring the top point of the triangle down to the center, folding along the existing creases.
- Repeat the previous step with the bottom point, folding it up to the center.
- Flip the paper over.
- Fold the top two corners inward, meeting at the center crease.
- Fold the top flap downward, aligning it with the bottom edge of the paper.
- Repeat the previous step on the other side.
- Finally, fold the model in half along the center crease, bringing the head and tail together.
Step 4: Add Details and Personalization Now that you have mastered the basic bird shape, it’s time to add details and make your creation unique. You can use a pencil to draw eyes, beaks, feathers, or any other desired features on your paper bird. Get creative and let your imagination soar!
Step 5: Explore Different Bird Species Once you feel comfortable with the basic bird design, it’s time to broaden your horizons. Research various bird species and their distinctive features. You can then apply your origami skills to create paper versions of these beautiful creatures. Experiment with different paper sizes, colors, and folding techniques to bring your favorite birds to life.
Step 6: Join Origami Communities and Workshops Origami is a thriving community with enthusiasts from all around the world. Join online forums, and social media groups, or attend local workshops to connect with fellow paper crafters. Sharing your creations, seeking advice, and learning from others can enhance your skills and keep you motivated.
Step 7: Practice and Patience Like any art form, mastering paper bird origami takes practice and patience. Don’t be discouraged if your initial attempts don’t turn out perfectly. Keep practicing, following tutorials, and exploring new techniques. With time, you will develop your own style and create astonishing paper bird masterpieces.
Conclusion:
Making easy paper birds through the art of origami is a fulfilling and enjoyable hobby. By following this step-by-step guide, you have learned the basics of creating beautiful paper birds. Remember to start with simple designs and gradually progress to more complex ones. Embrace your creativity, experiment


