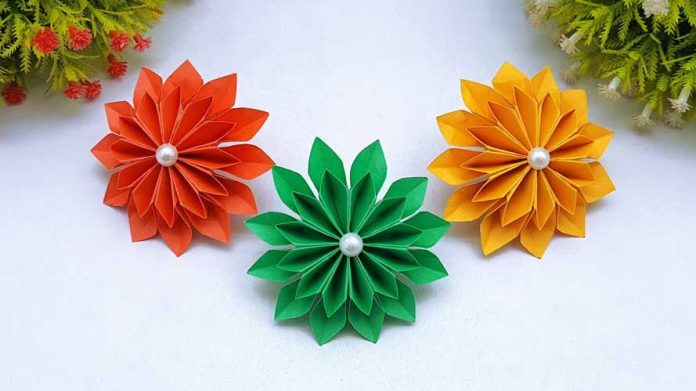
Paper flowers are a delightful and cost-effective way to add a touch of elegance to any occasion. Whether you’re looking to decorate your home, create stunning centerpieces, or engage in a fun crafting activity, making easy paper flowers is a perfect choice. In this comprehensive guide, we will walk you through the step-by-step process of creating beautiful paper flowers that will impress everyone.
Materials Needed:
Before we begin, gather the following materials:
- Colorful craft paper or cardstock
- Scissors
- Glue or adhesive
- Floral wire or pipe cleaners
- Pencil
- Ruler
- Floral tape (optional)
- Decorative accents (optional)
Step 1: Choosing the Flower Design Start by deciding which type of flower you want to create. Options include roses, daisies, tulips, and more. Consider the occasion or purpose of your paper flowers, as different flowers evoke different moods and styles.
Step 2: Preparing the Paper Select your desired colors of craft paper or cardstock. You can use a single color or mix and match to create vibrant combinations. Cut the paper into square or rectangular shapes, depending on the flower design you’ve chosen. Larger squares are ideal for larger flowers, while smaller squares work well for smaller blooms.
Step 3: Cutting the Petals Take a square piece of paper and fold it diagonally to form a triangle. Then, fold the triangle in half again to create a smaller triangle. Use a pencil and ruler to draw petal shapes along the folded edge, ensuring that the center of the flower remains intact. Cut along the lines, making sure not to cut through the center fold.
Step 4: Shaping the Petals Gently unfold the paper to reveal the petals. Carefully curl the petals using your fingers or a pencil to give them a natural, curved appearance. Repeat this process for each paper petal.
Step 5: Assembling the Flower Apply glue or adhesive to the bottom of the first petal and place it around the floral wire or pipe cleaner. Add more petals, slightly overlapping them, until the desired fullness is achieved. Secure each petal with glue or adhesive as you go. If using floral tape, wrap it around the wire or pipe cleaner to give a polished look.
Step 6: Adding Details and Accents To enhance the beauty of your paper flowers, consider adding details and accents. Use contrasting colored paper to create flower centers, leaves, or other decorative elements. Attach them to the floral wire or glue them directly onto the petals.
Step 7: Finishing Touches Allow the glue to dry completely before gently fluffing and adjusting the petals to your liking. Arrange the flowers in a vase, create a bouquet, or incorporate them into your desired craft or decor project.
Conclusion: Congratulations! You have successfully learned how to make easy paper flowers. With practice, you can experiment with different designs, sizes, and color combinations to create a stunning array of paper blooms. These handmade flowers are perfect for celebrations, gifts, or simply adding a touch of nature to your living space. Enjoy the creative process and let your imagination bloom!


