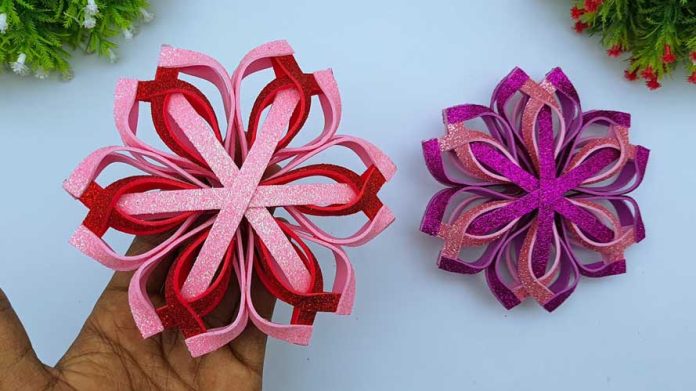
The holiday season brings with it a sense of wonder, joy, and creativity. One delightful way to infuse your home with the magic of the season is by crafting your own Foamiran Christmas snowflakes. These delicate and elegant decorations can adorn your tree, windows, or walls, adding a touch of winter wonder. In this step-by-step guide, we’ll explore the creative process of making Foamiran Christmas snowflakes, allowing you to craft unique, beautiful ornaments that capture the essence of the season.
Materials You’ll Need:
Before we begin crafting, let’s gather the essential materials required for creating Foamiran Christmas snowflakes:
- Foamiran sheets: Available in various colors, though white or shades of blue work well for the classic snowflake look.
- Snowflake templates: Download or create your own for design guidance.
- Pencil: For tracing templates onto Foamiran.
- Scissors: Sharp, precision scissors for intricate cuts.
- Craft knife: Useful for delicate cuts (optional).
- Cutting mat: To protect your work surface (optional).
- Embossing tools: To add texture and detail (optional).
- Glue: Clear craft glue or a hot glue gun.
- Ribbon or string: For hanging your snowflakes.
- Decorative elements: Such as rhinestones, glitter, sequins, or pearls (optional).
- Clear thread or fishing line: For hanging your snowflakes if preferred.
Now, let’s dive into the step-by-step process of creating Foamiran Christmas snowflakes:
Step 1: Choose Your Snowflake Design
- Begin by selecting a snowflake template that inspires you. You can find templates online or sketch your own for a unique touch.
- Snowflakes are known for their symmetry, so ensure your design reflects this.
Step 2: Trace the Design
- Place your chosen template on the Foamiran sheet.
- Gently trace the snowflake design onto the Foamiran using a pencil.
- Make sure your lines are precise and clear.
Step 3: Cut Out the Snowflake
- With sharp scissors or a craft knife (on a cutting mat), carefully cut along the traced lines to create your Foamiran snowflake.
- Take your time to make clean and intricate cuts.
Step 4: Emboss the Snowflake (Optional)
- To add texture and depth to your snowflake, you can use embossing tools.
- Gently press the tools onto the Foamiran to create patterns and details.
- This step is optional but can enhance the snowflake’s appearance.
Step 5: Decorate Your Snowflake (Optional)
- Add a touch of sparkle and elegance by embellishing your Foamiran snowflake with rhinestones, glitter, sequins, pearls, or other decorative elements.
- Apply clear craft glue to the desired areas and carefully place the decorations.
Step 6: Create a Hanging Loop
- If you intend to hang your Foamiran Christmas snowflake, cut a piece of ribbon or string to your desired length.
- Form a loop and tie the ends together.
- Attach the loop to the top of your snowflake using clear craft glue or by making a small hole and threading it through.
Step 7: Display Your Snowflake
- Your Foamiran Christmas snowflake is now ready to adorn your home. Hang it from a hook, on a Christmas tree, or in a window to catch the light.
- Consider creating multiple snowflakes with different designs and sizes for a stunning winter-themed display.
Conclusion:
Crafting Foamiran Christmas snowflakes is a delightful and creative way to infuse your holiday decorations with elegance and charm. These handmade snowflakes not only capture the beauty of winter but also showcase your unique style and craftsmanship. So, gather your materials, select your favorite snowflake templates, and embark on a creative journey that will fill your home with the enchantment of the holiday season. Happy crafting!


