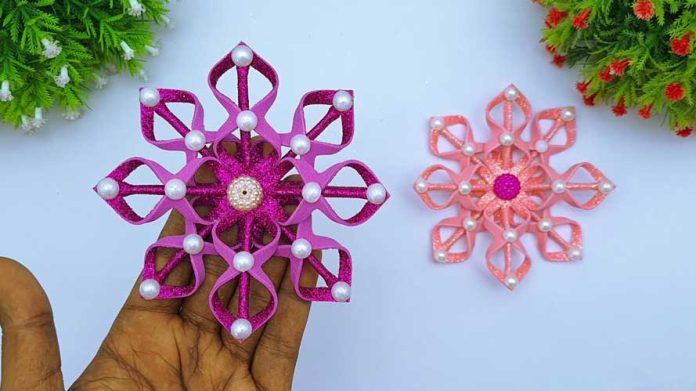
The holiday season is synonymous with warmth, joy, and a touch of shimmering magic. What better way to infuse your Christmas decor with that enchantment than by crafting glitter foam paper snowflakes? In this comprehensive step-by-step guide, we’ll walk you through the process of creating exquisite and glittering Christmas snowflakes using foam paper, adding a dazzling touch to your festive ambiance.
Materials Needed:
- Glitter foam paper (assorted colors if desired)
- Snowflake templates (printed or hand-drawn)
- Scissors
- Pencil
- Hole punch
- Ribbon, twine, or fishing line for hanging
- Glue or adhesive dots
- Optional: Rhinestones, beads, and sequins for extra embellishments
Step 1: Choose Your Snowflake Designs:
Select snowflake templates that resonate with your style. You can find templates online or draw your own. This is where you can get creative – mix and match various snowflake shapes and sizes for a diverse set of ornaments.
Step 2: Trace and Cut:
Place the chosen template on the backside of the glitter foam paper and trace the design using a pencil. Carefully cut along the traced lines. Remember, precise cutting contributes to the final polished look.
Step 3: Add Intricate Details:
Now is the time to give your snowflakes some intricate details. Use a hole punch to create small holes along the edges of your snowflake. These holes not only add a delicate touch but also allow light to pass through, enhancing the glittering effect.
Step 4: Glue and Embellish:
Apply a thin layer of glue or use adhesive dots to attach any optional embellishments like rhinestones, beads, or sequins. This step allows you to add a personal touch to each snowflake, making them truly one-of-a-kind.
Step 5: Create 3D Layers (Optional):
For an extra dimension, consider creating 3D layers. Choose another foam paper color and cut out a smaller version of the snowflake. Attach it to the center of the larger snowflake using glue or adhesive dots, slightly off-center to create depth.
Step 6: Attach Hanging Mechanism:
Punch a small hole near the top of your snowflake using a hole punch. This is where you’ll thread your ribbon, twine, or fishing line for hanging. Choose a string that matches your decor or contrasts for a playful look.
Step 7: Thread and Knot:
Thread the chosen hanging material through the hole and tie a knot to secure it. This step is essential to ensure your snowflakes stay securely hung in their designated spots.
Step 8: Arrange and Hang:
With your glitter foam paper Christmas snowflakes complete, it’s time to arrange and hang them. Display them on your Christmas tree, adorn your windows, or create a sparkling garland to grace your mantel. The choice is yours!
Step 9: Bask in the Sparkle:
Stand back and admire your handiwork. The glittering foam paper snowflakes will catch and reflect the light, creating a captivating display that radiates holiday magic.
Conclusion:
Crafting glitter foam paper Christmas snowflakes is a fantastic way to infuse your holiday decor with a touch of glamour and sparkle. With just a few simple materials and some creativity, you can create stunning ornaments that will add a touch of enchantment to your festive setting. So, gather your supplies, embrace your artistic spirit, and let the glittering snowflakes transform your home into a winter wonderland of shimmering beauty.


