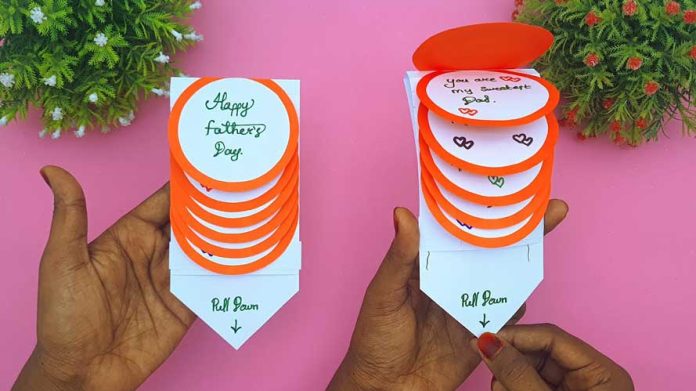
How To Make Greetings Card For Father’s Day: Crafting a Heartfelt Tribute to Dad
Father’s Day is the perfect occasion to show appreciation and love for the amazing dads in our lives. What better way to express your gratitude than with a handmade greetings card? In this step-by-step guide, we’ll walk you through the process of creating a personalized and heartfelt Father’s Day card. Let’s get started on this creative journey to make a special card that your dad will cherish!
Materials You’ll Need:
- Cardstock paper or thick paper
- Scissors
- Glue or double-sided tape
- Markers, colored pens, or watercolors
- Decorative elements (stickers, ribbons, buttons, etc.)
- Ruler
- Pencil
- Optional: printed photos, stamps, or patterned paper
Step 1: Gather Your Materials
Before diving into the crafting process, ensure you have all the necessary materials ready. Choose high-quality cardstock paper for a sturdy and professional-looking card. Gather your decorative elements to add a unique touch to your creation.
Step 2: Plan Your Design
Think about the design and layout of your Father’s Day card. You can sketch your ideas on a piece of scrap paper. Consider incorporating elements that reflect your dad’s personality, hobbies, or favorite colors. This step helps you visualize the final product and ensures a cohesive design.
Step 3: Cut and Fold the Cardstock
Cut the cardstock paper to your desired size for the greetings card. A typical size is 5×7 inches, but you can customize it to your preference. Fold the paper in half to create the card base. Use a ruler and pencil to mark precise measurements for a clean fold.
Step 4: Decorate the Front Cover
Now it’s time to unleash your creativity! Decorate the front cover of the card with your chosen design. You can draw, paint, or use colored pens to create patterns, shapes, or illustrations. Consider adding a heartfelt message like “Happy Father’s Day” or “Best Dad Ever” to make the cover more special.
Step 5: Add Personal Touches
Personalize the card by incorporating elements that hold sentimental value. Glue a photo of you and your dad, or use stamps and patterned paper to enhance the design. Adding personal touches makes the card unique and meaningful.
Step 6: Write a Heartfelt Message Inside
Open the card and write a heartfelt message inside. Express your gratitude, love, and appreciation for your dad. Share a favorite memory, a funny anecdote, or simply tell him how much he means to you. Your sincere words will make the card truly special.
Step 7: Embellish with Decorative Elements
Enhance your greetings card with decorative elements like stickers, ribbons, or buttons. Use glue or double-sided tape to securely attach these embellishments. Be mindful of the card’s overall balance and avoid overcrowding the design.
Step 8: Final Touches
Review your Father’s Day card for any finishing touches. Ensure all elements are securely attached, and check for any smudges or stray marks. Trim any excess paper or threads to give the card a polished look.
Step 9: Present Your Handcrafted Card
Your handmade greetings card is now ready to be presented to your dad! Place it in an envelope, and consider adding a personal touch with a wax seal or decorative tape. Hand-deliver the card or pair it with a thoughtful gift to make Father’s Day even more memorable.
Creating a handmade greetings card for Father’s Day is a heartfelt way to show your dad how much you care. With just a few simple materials and a dash of creativity, you can craft a beautiful and meaningful card that your dad will treasure. So, gather your supplies, let your imagination flow, and make this Father’s Day extra special with a personalized greetings card. Happy crafting!


