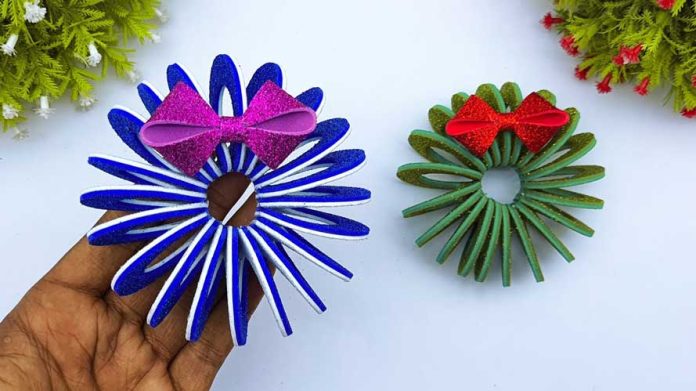
Christmas wreaths are a timeless symbol of warmth and welcome during the holiday season. While large wreaths are a popular choice for decorating doors, don’t overlook the charm of mini Christmas wreaths. These petite beauties can be used in a variety of creative ways, from adorning your tree to embellishing gifts. In this step-by-step guide, we’ll walk you through the process of making your very own mini Christmas wreaths, adding a touch of festive elegance to your holiday decor.
Materials You’ll Need:
Before we dive into crafting, let’s gather the materials required for making mini Christmas wreaths:
- Miniature wreath forms: You can find these at craft stores or online.
- Greenery: Artificial or real, such as pine sprigs or faux evergreen branches.
- Small ornaments: Tiny baubles, berries, or bells.
- Ribbon or twine: For hanging and decoration.
- Hot glue gun and glue sticks: To secure elements.
- Scissors: For cutting materials.
- Wire cutters: If using wire-based greenery.
- Decorative additions: Such as mini bows, miniature figurines, or tiny pine cones (optional).
Now, let’s create some festive magic with these mini Christmas wreaths!
Step 1: Choose Your Greenery
Begin by selecting the greenery for your mini wreaths. You can use real pine sprigs, artificial evergreen branches, or any other type of greenery that suits your holiday decor theme.
Step 2: Prepare Your Mini Wreath Forms
If your miniature wreath forms come with wireframes, use wire cutters to remove any excess or unwanted parts. Ensure they are clean and ready for decoration.
Step 3: Cut and Arrange the Greenery
- Cut small sections of your chosen greenery, typically about 3-4 inches in length.
- Arrange the greenery pieces around the wreath form. Start with the bottom layer, gluing them into place with a hot glue gun.
- Continue adding layers of greenery until you achieve the desired fullness and coverage. Overlap each piece slightly to conceal the wreath form.
Step 4: Add Ornaments and Decorations
- To make your mini Christmas wreaths festive, hot glue small ornaments, berries, bells, or other decorative elements onto the greenery.
- Be creative with your design, and don’t hesitate to mix and match ornaments to achieve your desired look.
Step 5: Attach Ribbon or Twine for Hanging
- Cut a piece of ribbon or twine to your desired length for hanging the wreath.
- Form a loop and attach it to the back of the mini wreath using hot glue.
Step 6: Final Touches
- Inspect your mini Christmas wreath for any loose pieces or areas that need additional glue.
- If you wish, add further embellishments like mini bows, tiny pine cones, or miniature figurines to enhance the holiday spirit.
Step 7: Display Your Mini Christmas Wreaths
Once your mini wreaths are complete, it’s time to find the perfect places to display them:
- Hang them on your Christmas tree as ornaments.
- Decorate garlands or swags with these charming accents.
- Use them as napkin rings for festive table settings.
- Attach them to holiday cards or gifts as delightful decorations.
Conclusion:
Crafting mini Christmas wreaths is a delightful and creative way to add a personal touch to your holiday decor. These charming decorations can be customized to match your unique style and preferences. Whether you’re an experienced crafter or a beginner, making mini Christmas wreaths is a fun and rewarding project that will infuse your home with the spirit of the season. So, gather your materials, embrace your creative spirit, and get ready to spread holiday cheer with these lovely miniature wreaths. Happy crafting and merry Christmas!


