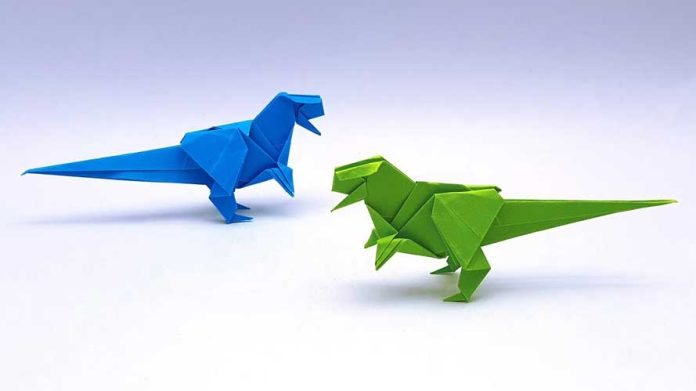
Origami, the art of paper folding, allows us to create fascinating creatures from a simple sheet of paper. In this step-by-step guide, we will explore the exciting world of origami by making an origami dinosaur. Get ready to embark on a creative journey and bring a prehistoric creature to life!
Materials Needed:
- Square origami paper (preferably 6×6 inches or larger)
- A flat and clean surface to work on
Step 1: Choose the Dinosaur Design There are various origami dinosaur designs to choose from, each with its unique characteristics. For this guide, we will focus on a simple and classic origami dinosaur design.
Step 2: Prepare the Paper Place the square origami paper on your work surface, with the colored side facing down. Ensure that one corner points towards you, forming a diamond shape.
Step 3: Fold in Half Fold the paper in half diagonally, bringing the top corner down to meet the bottom corner. Crease the fold well and then unfold the paper to its original position.
Step 4: Create a Triangle Base Fold the paper in half diagonally again, this time bringing the right corner down to meet the left corner. Crease the fold well and unfold the paper again.
Step 5: Fold the Corners Take the top layer of the right corner and fold it upwards, aligning the top edge with the central crease. Repeat this step with the left corner, folding it upwards as well. You should have a smaller triangle shape with two flaps at the bottom.
Step 6: Shape the Head and Tail Fold the top layer of the bottom corner upwards, aligning it with the top point of the triangle. This fold will become the dinosaur’s head. Next, fold the bottom layer of the bottom corner downwards, creating a small triangle shape. This will form the dinosaur’s tail.
Step 7: Form the Body and Legs Fold the right and left corners of the triangle towards the center, overlapping them slightly. Crease the folds well. These folds will shape the dinosaur’s body and form the legs.
Step 8: Add Details Use your fingers or a pencil to shape and define the dinosaur’s body, head, and tail. Create curves and angles to give it a more realistic appearance. Feel free to get creative and add small details like eyes, spikes, or scales using markers or colored pencils.
Step 9: Display and Enjoy Congratulations! You have successfully created an origami dinosaur. Display your creation proudly or share it with others to admire. You can make multiple dinosaurs in different colors and sizes to build your very own origami, Jurassic Park!
Conclusion: Origami is a fascinating art form that allows us to transform a simple sheet of paper into something extraordinary. By following this step-by-step guide, you have learned how to make an origami dinosaur, unleashing your creativity and bringing a prehistoric creature to life.
Remember, practice makes perfect in the world of origami. As you become more comfortable with the folding techniques, you can explore more complex origami dinosaur designs and experiment with different sizes and colors. Embrace the joy of creation and continue to explore the endless possibilities of origami.
Enjoy the process, share your origami dinosaurs with friends and family, and let your imagination roam free in the prehistoric world of paper folding. Happy folding!


