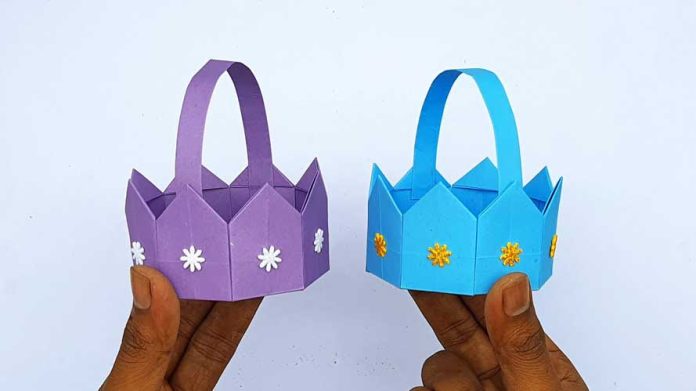
Add a touch of elegance and charm to your home decor or special occasions with a delightful paper flower basket. In this step-by-step guide, we’ll walk you through the process of creating a beautiful paper flower basket that is both easy to make and visually stunning. Whether you’re a crafting enthusiast or a beginner looking to explore your creative side, this project will allow you to showcase your skills and create a unique centerpiece or gift. So, let’s dive into the world of paper crafting and learn how to make an easy paper flower basket!
Materials Needed: Before we begin, gather the following materials:
- Colored craft paper or cardstock (for the basket and flowers)
- Scissors
- Glue stick or craft glue
- Pencil
- Ruler
- Ribbon or twine (optional)
- Decorative elements (such as beads, pearls, or glitter) for embellishment (optional)
Step 1: Creating the Basket Base Start by selecting a colored craft paper or cardstock for the basket. Measure and cut a rectangular piece, approximately 9 inches by 6 inches. This will be the base of your paper flower basket.
Step 2: Folding and Assembling the Basket With colored paper or cardstock, fold the longer sides of the rectangle towards the center, creating two parallel folds. Apply glue along the outer edges of one of the shorter sides and bring the opposite shorter side over, securing the edges together. This forms a rectangular tube shape, which will be the body of your basket.
Step 3: Shaping the Basket To give the basket a charming shape, gently press the sides of the rectangular tube inward, creating a curved design. Hold the shape firmly until the glue sets and the basket retains its form.
Step 4: Adding the Basket Handle Cut two thin strips of colored paper or cardstock, approximately 1 inch wide and long enough to serve as the basket’s handle. Attach each end of the strips to the inner edges of the basket, ensuring they are evenly positioned and securely glued.
Step 5: Crafting Paper Flowers Now, let’s create the paper flowers that will adorn the basket. Cut multiple small circles from colored craft paper or cardstock, approximately 2 inches in diameter. These circles will form the petals of the flowers.
Step 6: Forming the Flower Petals Fold each circle in half, then fold it in half again to create a quarter-circle shape. Apply a small amount of glue to the bottom corner of the folded quarter-circle and attach it to the center of another circle, creating a petal. Repeat this process with the remaining circles, attaching them together to form a flower shape.
Step 7: Decorating the Flowers and Arrange to Add decorative elements like beads, pearls, or glitter to the center of each flower for an extra touch of elegance. Once the flowers are complete, arrange them inside the paper flower basket, gluing them in place. You can use a variety of colors and sizes to create a visually appealing arrangement.
Step 8: Optional: Adding Ribbon or Twine For an added decorative element, you can attach ribbon or twine around the handle of the paper flower basket. This will enhance the overall aesthetic and provide a finishing touch.
Conclusion: Congratulations! You have successfully created an easy paper flower basket. This charming craft piece is perfect for adding a touch of beauty to your home decor or as a thoughtful handmade gift for special occasions. Feel free to experiment with different colors, sizes, and flower arrangements to suit your personal style and preferences. Let your creativity bloom as you continue exploring the world of paper crafting and unleash your inner artist. So, gather your materials, follow the step-by-step instructions in this guide, and enjoy the satisfaction of creating a stunning paper flower basket that will captivate hearts and inspire joy!


