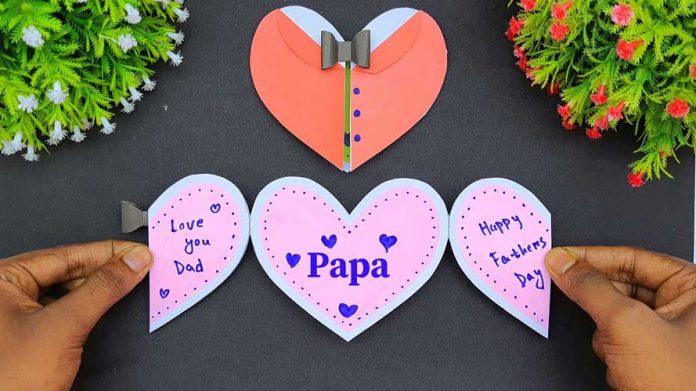
Father’s Day is a special occasion to celebrate the amazing dads in our lives. Instead of buying a generic card, why not go the extra mile and create a personalized paper greeting card that will truly touch his heart? In this step-by-step guide, we’ll walk you through the process of making a stunning paper card for Father’s Day. Let’s get started!
Step 1: Gather Your Supplies Before diving into the creative process, gather the necessary supplies. You’ll need:
- Cardstock or heavy paper
- Scissors
- Craft knife
- Ruler
- Pencil
- Decorative papers
- Glue stick or double-sided tape
- Markers, colored pencils, or gel pens
- Stickers, ribbons, or other embellishments
- Optional: Rubber stamps, ink pads, and embossing powder
Step 2: Choose a Design Think about your dad’s preferences and interests. Does he love sports, nature, or a specific hobby? Consider these factors when selecting a design for your card. You can find inspiration from online resources, and magazines, or create your own unique design.
Step 3: Create a Card Base Using the cardstock or heavy paper, fold it in half to create the card base. You can choose any size you prefer, but a standard 8.5×11-inch sheet folded in half works well. Use a ruler to ensure clean, straight folds.
Step 4: Cut and Assemble Decorative Papers Select decorative papers that complement your chosen design. Cut them into smaller pieces or shapes to fit your card layout. Experiment with different combinations until you find the perfect arrangement. Use a glue stick or double-sided tape to adhere the papers to the card base.
Step 5: Add Personal Touches Now comes the fun part—personalizing the card! Write a heartfelt message to your dad inside the card. Use markers, colored pencils, or gel pens to add color and creativity. You can also include meaningful quotes, poems, or memories.
Step 6: Embellish and Decorate Enhance the card’s aesthetics by adding embellishments. Use stickers, ribbons, or other decorative elements that resonate with your dad’s interests. Get creative with your choices and placement to make the card visually appealing and unique.
Step 7: Incorporate Handmade Elements If you want to take your card to the next level, consider incorporating handmade elements. You can create paper flowers, origami shapes, or even a pop-up feature. YouTube tutorials and online resources offer various techniques to explore.
Step 8: Finishing Touches Review your card and make any final adjustments. Ensure all the elements are securely attached, and the card looks balanced and visually pleasing. Trim any excess paper or threads for a neat finish.
Step 9: Write a Thoughtful Message Before presenting the card to your dad, write a heartfelt message on the inside. Express your love, gratitude, and appreciation for everything he does. Your words will undoubtedly make the card even more special.
Step 10: Presenting Your Creation When Father’s Day arrives, present your handmade card to your dad with a smile. Watch his face light up with joy as he recognizes the thought and effort you put into creating something unique just for him.
Conclusion:
Making a paper greeting card for Father’s Day is a heartfelt way to show your dad how much you care. By following this step-by-step guide, you can create a personalized and meaningful card that will make his day extra special. Remember, it’s the love and effort you put into the card that truly matters. So, unleash your creativity and enjoy the process of crafting a beautiful.


