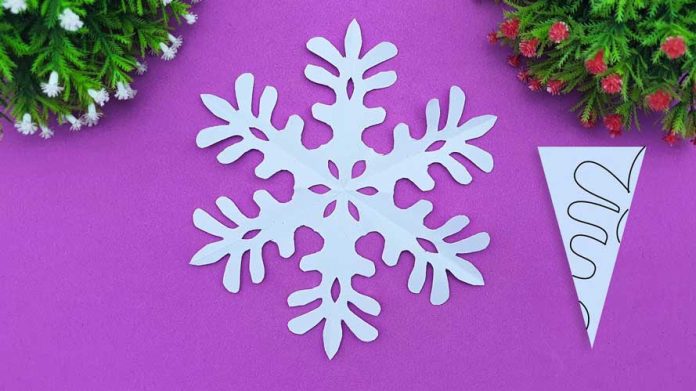
There’s something enchanting about snowflakes, and capturing their beauty in a three-dimensional form adds an extra touch of magic. Creating 3D paper snowflakes is a wonderful craft that can be enjoyed by all ages. In this step-by-step guide, we’ll explore the art of making stunning 3D paper snowflakes that will bring a winter wonderland to your home.
Materials Needed: Before we begin, gather the following materials:
- White paper (preferably cardstock)
- Scissors
- Pencil
- Ruler
- Glue or adhesive tape
- Optional: Colored paper, glitter, or other decorative elements
Step 1: Prepare the Paper Start by selecting a sheet of white paper. Cardstock is recommended as it provides a sturdy base for the 3D snowflake. Cut the paper into a square shape if it isn’t already one. A larger square will allow for more intricate designs, but you can start with any size you prefer.
Step 2: Fold the Paper Fold the square paper diagonally to form a triangle. Ensure that the edges align perfectly, and crease the fold firmly. Smooth out any wrinkles for a neat base.
Step 3: Divide the Triangle Take the folded triangle and divide it into three equal sections. Fold the triangle in half, matching the two corners of the longest side, and crease the fold. Unfold the paper to reveal three smaller triangles within the larger one.
Step 4: Design the Snowflake Using a pencil, let your creativity flow, and draw a unique design on one of the smaller triangles. Remember that the design will be repeated four times, so ensure that it connects well at the edges. Experiment with various patterns, curves, and cutouts to create a captivating snowflake.
Step 5: Cut Along the Lines Carefully cut along the pencil lines you drew in the previous step. Take your time to ensure precision and intricate details. Remember not to cut along the folded edges that hold the snowflake together.
Step 6: Unfold the Snowflake Gently unfold the paper to reveal your magnificent 3D paper snowflake. Admire the intricate pattern you’ve created. If desired, you can enhance the snowflake’s beauty by adding glitter or using colored paper for different sections.
Step 7: Repeat and Experiment To create a collection of 3D paper snowflakes, repeat the above steps with new pieces of paper. Feel free to experiment with different designs, sizes, and levels of complexity. Each snowflake can be a unique masterpiece.
Step 8: Assemble and Decorate Now, it’s time to bring your 3D snowflakes to life. Take two identical snowflakes and apply a small amount of glue or use adhesive tape to attach them together at the center. Repeat this process with additional snowflakes until you achieve the desired 3D effect. You can also attach a string or ribbon to hang the snowflakes or create a garland.
Step 9: Display and Enjoy Find the perfect spot to display your 3D paper snowflakes. Hang them in windows, adorn your walls, or create a captivating centerpiece. Watch as they catch the light and create a magical ambiance in your home.
Conclusion: Making 3D paper snowflakes is a delightful and creative activity that allows you to bring the beauty of winter indoors. With simple materials and the steps outlined above, you can craft captivating snowflakes that will add a touch of enchantment to your surroundings. So, gather your supplies, let your imagination soar, and create a winter wonderland with these mesmerizing 3D paper snowflakes.


