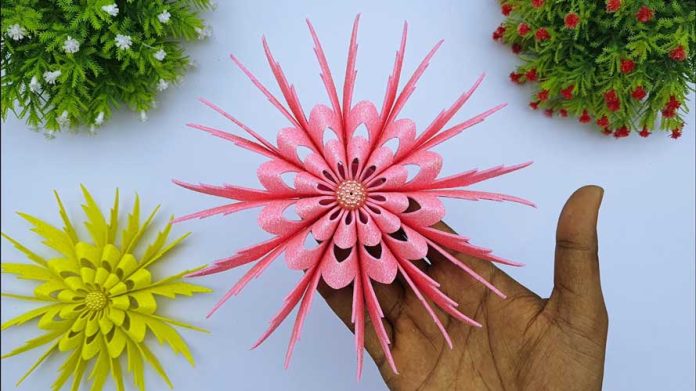
Winter’s charm lies in its snow-covered landscapes and intricate snowflakes. While Mother Nature creates her own, crafting your own snowflakes is a delightful way to bring the magic of winter indoors. In this step-by-step guide, we’ll explore how to design and create unique snowflakes using foam sheets. Foam sheets offer versatility, allowing you to craft intricate snowflakes with ease. So, grab your materials, and let’s get started on this creative winter journey!
Materials You’ll Need:
Before we dive into crafting, let’s gather the essential materials you’ll need for creating foam sheet snowflakes:
- Foam sheets: White or colored, depending on your preference.
- Scissors: Sharp and precise for cutting intricate designs.
- Pencil: For sketching your snowflake design (optional).
- Craft knife: Useful for detailed cuts (optional).
- Cutting mat: To protect your work surface and ensure clean cuts.
- Glue: Clear craft glue works well.
- Ribbon or string: To hang your snowflakes.
- Embellishments: Glitter, sequins, or rhinestones for decoration (optional).
Now, let’s explore the step-by-step process of creating new snowflake designs with foam sheets.
Step 1: Design Your Snowflake
- Begin by sketching your snowflake design on a piece of paper. This step is optional but can help you plan your foam sheet design.
- Remember that snowflakes are typically six-sided, so aim for symmetry in your design.
Step 2: Transfer Your Design
- Place the paper design on top of your foam sheet.
- Use a pencil to trace the design onto the foam sheet.
- Ensure your lines are clear and well-defined.
Step 3: Cut Out the Snowflake
- Now, it’s time to cut out your snowflake design from the foam sheet.
- You can use scissors for basic shapes or a craft knife for intricate cuts.
- Work slowly and carefully, following the lines you’ve traced.
- If you’re using a craft knife, remember to place a cutting mat underneath to protect your surface.
Step 4: Add Decorations (Optional)
- To give your foam sheet snowflake some extra sparkle, you can add embellishments like glitter, sequins, or rhinestones.
- Apply a thin layer of clear craft glue to the foam sheet where you want to add decorations.
- Sprinkle or carefully place the embellishments on the glue.
- Allow the glue to dry completely before moving on to the next step.
Step 5: Create a Hanging Loop
- To hang your foam sheet snowflake, cut a piece of ribbon or string to your desired length.
- Form a loop and tie the ends together.
- Glue the loop to the back of your snowflake at the top.
Step 6: Display Your Snowflake
- Your foam sheet snowflake is now ready to be displayed.
- Hang it from a hook on your wall, a curtain rod, or even in a window.
- You can also create multiple snowflakes with different designs and sizes to make a stunning winter-themed display.
Step 7: Get Creative
- Don’t hesitate to experiment with different foam sheet colors, sizes, and designs to create a diverse set of snowflakes.
- You can layer smaller snowflakes on top of larger ones for a 3D effect.
- Personalize your snowflakes with initials or names if you’re creating them as gifts.
Conclusion:
Crafting foam sheet snowflakes allows you to bring the beauty of winter into your home in a creative and customizable way. With just a few materials and a touch of imagination, you can design and create unique snowflakes that capture the essence of the season. So, embrace the magic of winter, gather your supplies, and start crafting your foam sheet snowflakes to adorn your home with seasonal charm. Happy crafting!


